 Pin it
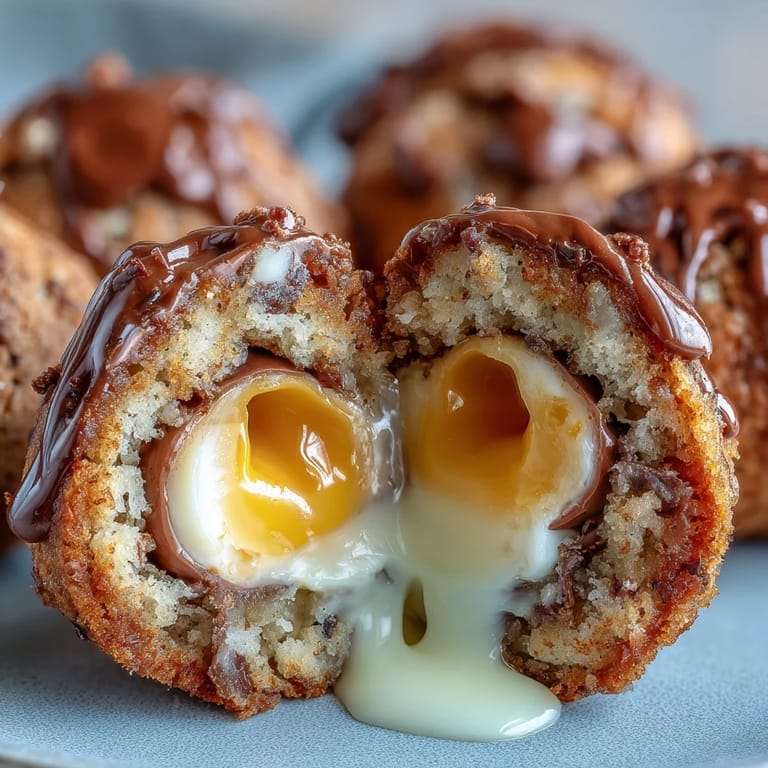
 I was sorting through Easter decorations one April when my daughter found a stray Cadbury Creme Egg wedged behind some pastel tissue paper. She held it up with the kind of wonder only kids can muster, and I thought, why are we saving these just for the hunt? That same afternoon, I started experimenting in the kitchen, wrapping cookie dough around those creamy centers, and the moment one came out of the oven with that glossy chocolate shell and oozing golden middle, I knew we'd stumbled onto something special.
My husband was skeptical at first, convinced I was overcomplicating cookies. Then he bit into one still warm from the cooling rack, and his whole expression changed. He didn't say anything for a solid ten seconds, just closed his eyes, and I didn't need words to know I'd nailed it. Now they're his go-to when he wants to surprise someone, and he's become oddly protective about the Cadbury egg inventory.
Ingredients
- Unsalted butter: Room temperature butter creams better and gives you control over salt levels; pulling it out an hour before baking makes all the difference.
- Brown sugar and granulated sugar: The combination of both creates that perfect chewy-crispy texture, with brown sugar bringing moisture and molasses depth.
- Large eggs: Make sure they're actually room temperature too, so they blend smoothly without making your dough greasy or broken.
- Vanilla extract: A full two teaspoons might seem generous, but it balances the sweetness of the candy center beautifully.
- All-purpose flour: Don't sift unless your flour is really compacted; spoon it into your measuring cup and level it off for accuracy.
- Baking soda and salt: The soda helps cookies spread and brown, while salt amplifies all the other flavors in ways you won't consciously notice but will definitely feel.
- Semisweet chocolate chips: These work because they're not too sweet on their own, letting the Cadbury egg be the star of the show.
- Mini Cadbury Creme Eggs: Chilling them in the freezer for at least 30 minutes before stuffing is non-negotiable if you want them to stay intact during baking.
Tired of Takeout? 🥡
Get 10 meals you can make faster than delivery arrives. Seriously.
One email. No spam. Unsubscribe anytime.
Instructions
- Set your stage:
- Heat your oven to 350°F and line two baking sheets with parchment paper. This gives you space to work without cookies crowding each other and burning unevenly.
- Cream the butter and sugars:
- In a large bowl, beat the softened butter with both sugars for about 2 to 3 minutes until it's light, fluffy, and noticeably pale. You'll see the color shift, and when you pull the beaters up, the mixture should cling in soft peaks.
- Build the wet base:
- Add eggs one at a time, beating well after each addition so they're fully incorporated. Then add your vanilla and mix until everything looks homogenous and smells absolutely wonderful.
- Combine dry ingredients separately:
- In another bowl, whisk together flour, baking soda, and salt to distribute the leavening evenly. This prevents pockets of soda that can taste bitter and metallic in your finished cookies.
- Bring it together gently:
- Add the dry mixture to your wet ingredients slowly, mixing just until you don't see any white streaks of flour. Overmixing develops gluten and makes cookies tough instead of tender.
- Fold in chocolate chips:
- Stir in your chocolate chips until they're distributed throughout, but don't crush them in the process. You want intact chips that melt slightly when the cookie bakes.
- Prepare the egg centers:
- Make sure your Cadbury eggs are really cold and unwrapped. Cold eggs are less likely to burst through the dough or leak filling everywhere.
- Stuff and seal:
- Scoop about 2 tablespoons of dough, flatten it into a thin disk in your palm, place a chilled egg in the middle, then wrap the dough carefully around it, pressing gently so it's completely sealed. If dough cracks, just pinch it back together with a little extra dough.
- Space them properly:
- Place stuffed cookies on your prepared sheets about 2 inches apart because they'll spread a bit as they bake. Crowding them means they'll bake unevenly and potentially stick together.
- Bake to golden perfection:
- Bake for 12 to 14 minutes, watching for the edges to turn golden brown while the centers still look slightly soft and underbaked. They'll continue cooking on the hot pan after you remove them from the oven.
- Cool strategically:
- Leave them on the baking sheet for 5 minutes so they set enough to move without falling apart. Then transfer to a wire rack where air can circulate underneath, preventing soggy bottoms.
 Pin it
 Easter morning last year, my daughter stayed up past her bedtime with me finishing a batch while we watched the rain pour down outside. She carefully arranged them on a platter for the next morning's brunch, and when our guests bit into their first cookie, the whole room seemed to light up together. Food has a way of doing that sometimes, especially when it's made with people you love watching over your shoulder.
The Texture Secret
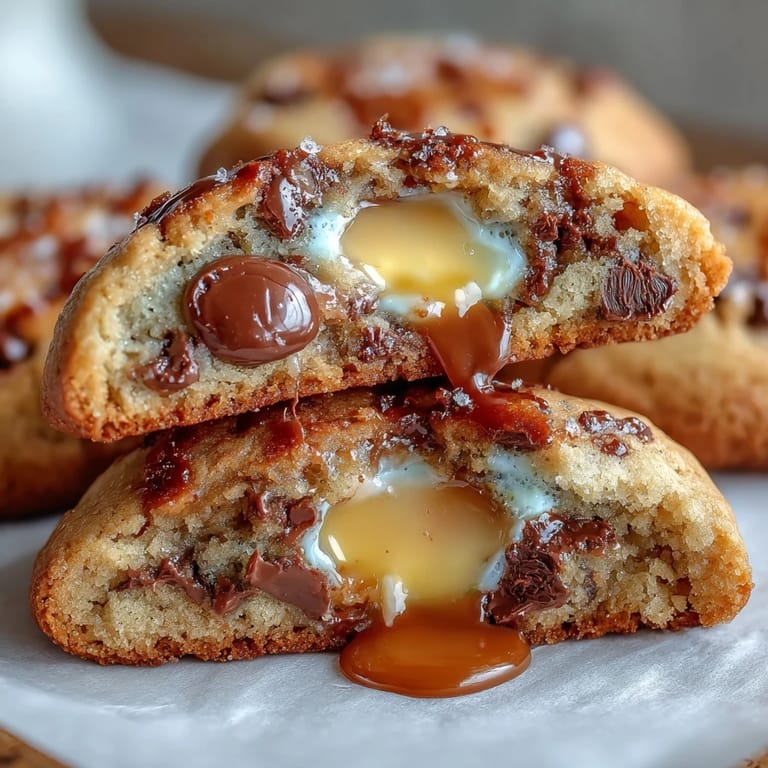
The magic of these cookies lives in that contrast between the crispy-chewy outer cookie and the silky filling inside. I used to overbake them thinking they needed to be completely set, but undercooking them by just a minute or two keeps everything tender and lets the warm cookie actually meld with the candy center. The residual heat from the baking sheet during those first five minutes of cooling is doing most of the work, so resist the urge to move them too soon.
Variations Worth Trying
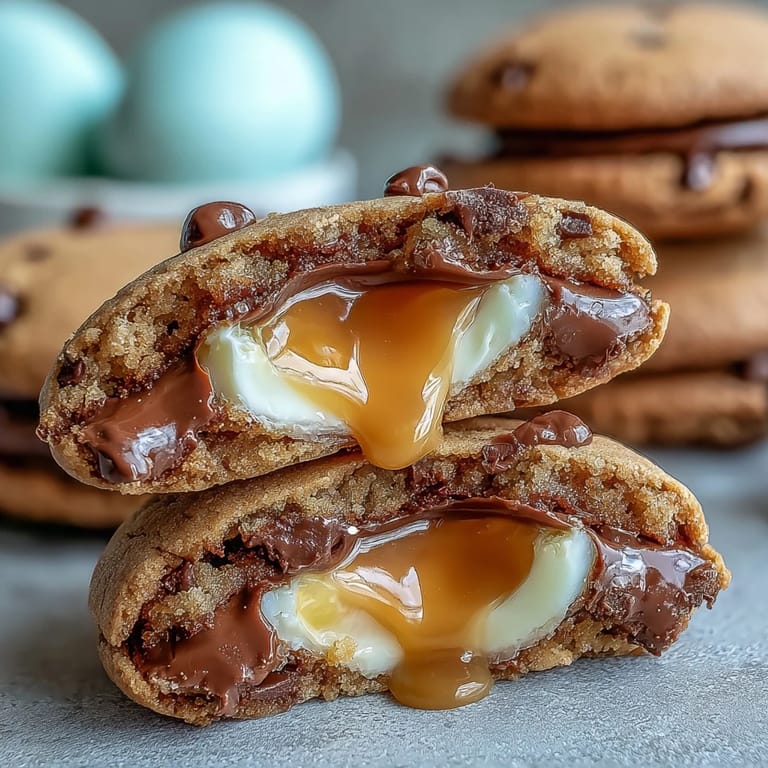
Once you master the basic version, you'll start thinking about swaps. I've tried dark chocolate chips for a more sophisticated bite, milk chocolate for something richer, and even mixed in some sea salt to make everything pop. Different people have luck with caramel-filled eggs or regular chocolate-filled ones during non-Easter seasons. The dough itself is forgiving enough that your favorite mix-ins will work beautifully.
Serving and Storage Wisdom
These cookies taste absolutely best served still warm or at room temperature the same day you bake them, when the filling is gooey and the cookie is at its most tender. If you need to make them ahead, the dough freezes beautifully for up to three weeks, so you can scoop and stuff cookies whenever you want fresh ones. Store baked cookies in an airtight container for up to three days, though honestly they rarely last that long in my house.
- Warm cookies straight from the oven with cold milk is the absolute perfect pairing.
- If cookies harden after a day, a quick 10-second microwave softens them back to chewy perfection.
- The dough actually benefits from being made a few hours ahead, so the flavors mellow and develop.
 Pin it
 These cookies transformed something as simple as a chocolate chip recipe into a moment of genuine surprise and delight. They remind me that sometimes the best ideas come from standing in your kitchen on an ordinary day, wondering what would happen if you tried something a little different.