 Pin it
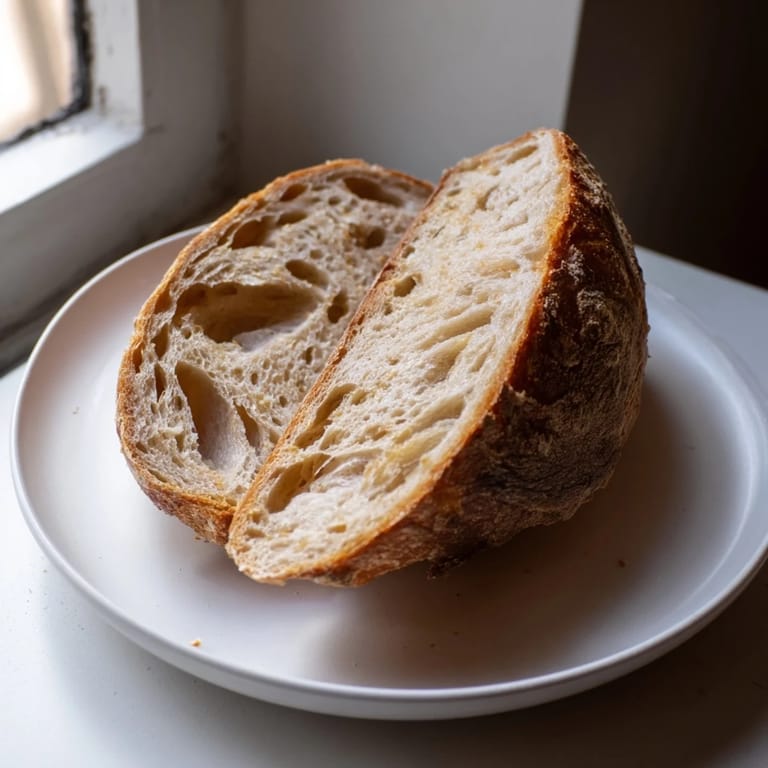
 I'll never forget the first time I pulled a crusty, golden loaf from my Dutch oven and heard that satisfying crackle as it cooled. It was a moment of pure kitchen magic—something I thought required years of experience and careful technique, yet there it was, born from nothing more than flour, water, a pinch of yeast, and time. That's when I discovered no-knead bread, and it completely changed how I think about baking. Now, whenever I have a quiet evening, I mix up a simple dough and let the hours do the work for me.
I made this bread for a dinner party on a rainy Saturday, and my friend Sarah stood in the kitchen just watching it bake, mesmerized by the steam and that incredible aroma filling the whole house. When I pulled it out, golden and crackling, she actually gasped. We tore into it warm with butter, and she asked for the recipe before we'd even finished the first slice. That's when I knew this recipe was special—it wasn't just about the bread anymore, it was about the moment we shared.
Ingredients
- All-purpose flour (3 cups/375 g): The backbone of your bread—use a good quality flour if you can, and measure it by spooning into your measuring cup rather than scooping, which packs it too tightly and makes dense bread
- Instant yeast (1/4 teaspoon/1 g): Just a whisper of it, which is the whole secret to this method—a tiny amount works with time instead of heat and effort
- Salt (1 1/4 teaspoons/8 g): This enhances flavor and helps control fermentation, so don't skip it even though the amount seems small
- Lukewarm water (1 1/2 cups/360 ml): The water should feel warm to your pinky finger but not hot—around 90–100°F is perfect, as too hot will kill your yeast and too cold will slow everything down
Tired of Takeout? 🥡
Get 10 meals you can make faster than delivery arrives. Seriously.
One email. No spam. Unsubscribe anytime.
Instructions
- Mix your simple base:
- Whisk the flour, yeast, and salt together in a large bowl—this only takes a minute and makes sure everything is evenly distributed so your dough rises predictably
- Bring it together with water:
- Pour in the lukewarm water and stir with a wooden spoon or spatula until everything is shaggy and sticky, like a rough batter with visible flour streaks; don't worry about it being messy, that's exactly right
- Let time do the heavy lifting:
- Cover your bowl tightly with plastic wrap or a clean towel and tuck it somewhere at room temperature—your countertop, a cabinet, even a cool corner of your bedroom works; come back in 12 to 18 hours when the surface is bubbling and the dough has roughly doubled
- Gently shape your dough:
- Dust your work surface lightly with flour and turn the dough out; with floured hands, fold it over itself once or twice in a gentle, casual way—you're not kneading, just giving it a little confidence before its final rise
- Shape and rest:
- Form the dough into a loose ball, seam-side down on parchment paper, then cover it with a towel while your oven does its thing; this 30 to 60 minute rest at room temperature lets the gluten relax and prepares it for the heat
- Heat your vessel:
- Place your Dutch oven or heavy lidded pot inside the oven and preheat to 450°F for at least 30 minutes—this is crucial because the trapped steam is what creates that crackling, bakery-style crust
- Bake with the lid on:
- Carefully remove the screaming-hot pot, carefully lower your dough (still on parchment) into it, and cover with the lid; bake for 30 minutes while steam builds and the crust sets
- Finish until golden:
- Remove the lid and bake another 15 minutes until the top is deep golden brown and the crust sounds hollow when you tap it—if it still looks pale, give it a few minutes more
- Cool with patience:
- Transfer the bread to a wire rack and let it cool completely, even though every fiber of your being wants to slice into it warm; this resting period lets the crumb set so it doesn't squish when you cut
 Pin it
 There's something profoundly grounding about making bread this way—about understanding that the best things often require patience rather than fussing. I started making this bread during a stressful season of my life, and I found myself drawn to the rhythm of it: mix tonight, check tomorrow, bake the next day. It gave me something I could count on, something that would turn out beautifully if I just trusted the process.
The Magic of Long Fermentation
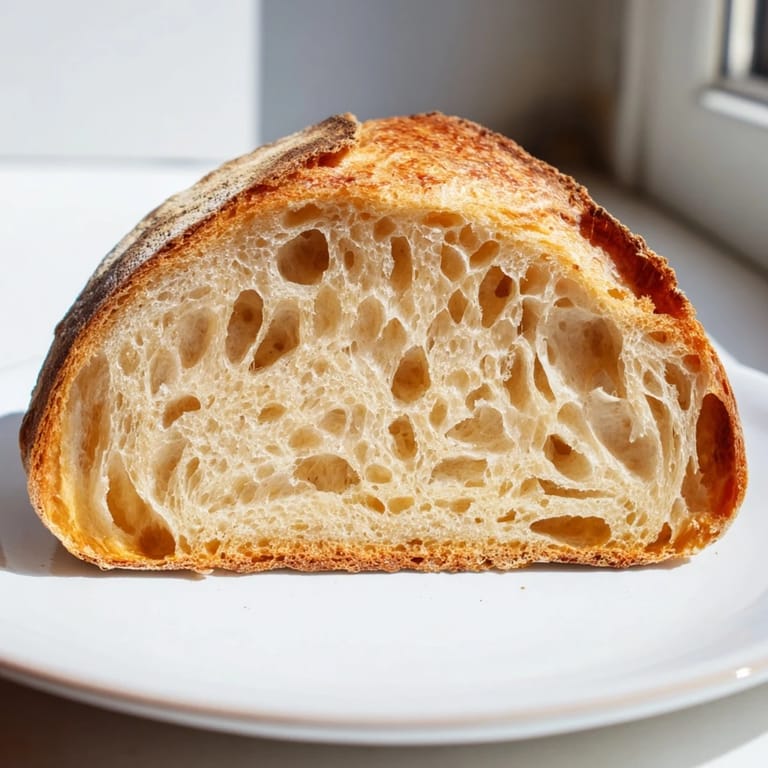
Most bread recipes rush the yeast by using a lot of it and forcing it to work quickly with heat. This recipe does the opposite—a tiny amount of yeast working slowly over 12 to 18 hours develops complex flavors you simply can't rush. The dough ferments gently at room temperature, developing acidity and depth that make store-bought bread taste flat by comparison. You'll notice the dough becomes increasingly bubbly as time passes, and by the end, it should look almost alive. This slow method also gives you flexibility: if you wake up and your dough has only risen for 10 hours, it's fine; if it's been 20 hours, it's still fine. The dough is forgiving in a way that quick-rise breads never are.
Steam and Crust
The Dutch oven is not just a convenience—it's the entire reason this bread works. When you lower your cold dough into a screaming-hot pot and slam the lid down, you're creating a mini steam chamber. The moisture from the dough itself creates an environment where the crust can brown and crisp without the interior drying out. For the first 30 minutes, the dough steams in this enclosed space, which allows the crust to expand and develop that beautiful color. When you remove the lid, the steam escapes and the crust crisps up further. If you try this without a Dutch oven, you can spray the dough lightly with water before baking and mist the oven walls, but the results won't be quite as dramatic.
Simple Variations and Flavor Twists
Once you've made this basic loaf a few times and feel confident, the possibilities open up. About an hour before the final rise, you can fold in fresh herbs like rosemary or thyme, sesame seeds, poppy seeds, or even a handful of roasted garlic cloves. For a sweeter bread, add a tablespoon of honey or sugar to the dough. Some bakers swear by adding a tablespoon of whole wheat flour for complexity. The beauty of this recipe is that it's a blank canvas—the long fermentation can handle additions without falling apart. Just remember that major additions might need a slightly longer rest, and avoid anything too wet or too dry.
- Try a mix of white and whole wheat flour for nuttier flavor and more interesting texture
- Fresh herbs should go in during the first rest, but seeds can wait until you're shaping the dough
- Save a small piece of dough from one bake to use as a starter for the next loaf if you want to get fancy
 Pin it
 This bread recipe gave me back something I thought I'd lost: the simple pleasure of feeding people something I made with my own hands. In a world that pushes us to do more and faster, there's real magic in a recipe that asks you to slow down and trust time.
Recipe FAQs
- → What makes no-knead bread different?
The dough requires no vigorous kneading; instead, a long resting period allows gluten to develop naturally, resulting in a tender crumb and crusty exterior.
- → Can I add flavors to the dough?
Yes, herbs, seeds, or roasted garlic can be mixed in before the initial rest to enhance flavors without altering the basic technique.
- → Why use a Dutch oven for baking?
Baking in a Dutch oven traps steam, which helps create a crisp, golden crust while keeping the inside moist and airy.
- → How long should the dough rest?
The dough needs 12–18 hours at room temperature to develop flavor and rise fully, so planning ahead is essential.
- → What type of flour is best for this bread?
All-purpose flour works well, providing a balanced texture and structure suitable for this technique.