 Pin it
 I still remember the first time I made pizza dough from scratch at home. My dad used to take us to this little Italian place on Friday nights, and I'd watch the baker stretch dough in the open kitchen like he was performing magic. Years later, standing in my own kitchen with flour on my hands and a bowl of bubbly yeast, I finally understood that magic. It wasn't complicated at all—just flour, water, yeast, and time. That first pizza we pulled from the oven, golden and crispy with toppings falling off the edges, tasted like coming home.
I'll never forget the night my eight-year-old asked if we could make pizza together. She stood on a stool, flour dusting her hair, kneading dough with both hands while telling me about her day. When we pulled those pizzas from the oven, she was prouder than I'd ever seen her. Now, years later, pizza night is still our thing—and she still insists on helping with the dough.
Ingredients
- Bread flour (4 cups/500g): This is your foundation. Bread flour has more gluten than all-purpose, which gives you that chewiness and structure that makes pizza dough special. Keep extra on hand for dusting—trust me, you'll need it when the dough gets sticky.
- Active dry yeast (2¼ tsp/1 packet): This tiny packet is your leavening agent, the thing that makes the dough rise and become airy. Make sure it's fresh—old yeast won't foam, and you'll be stuck with a dense brick instead of a cloud.
- Fine sea salt (1½ tsp): Salt does more than season; it strengthens the gluten and controls how fast the yeast works. Don't skip it or reduce it—it's there for a reason.
- Sugar (1 tsp): A tiny bit of sweetness feeds the yeast and helps it wake up. It's subtle but essential.
- Warm water (1½ cups/360ml): Temperature matters here—too cold and the yeast sleeps; too hot and you'll kill it. Around 110°F is the sweet spot, warm enough that you can comfortably hold your finger in it for a few seconds.
- Olive oil (2 tbsp): This adds richness and keeps the dough tender. It also prevents sticking and gives you that slight golden flavor.
Tired of Takeout? 🥡
Get 10 meals you can make faster than delivery arrives. Seriously.
One email. No spam. Unsubscribe anytime.
Instructions
- Wake up your yeast:
- Pour warm water into a large bowl and sprinkle in the sugar and yeast. Stir gently and step back. Within 5 to 10 minutes, you'll see it transform into a foamy, fragrant mixture. If it doesn't foam, your yeast is dead—toss it and start over. This foam tells you everything is ready to go.
- Bring it together:
- Pour the olive oil into your yeast mixture, then add the flour and salt. Stir with a wooden spoon, pulling everything from the sides of the bowl toward the center. It'll look shaggy and messy at first, like a pile of flour that happened to get wet. That's exactly right. Keep stirring until there's no dry flour left clinging to the bottom.
- Get your hands in there:
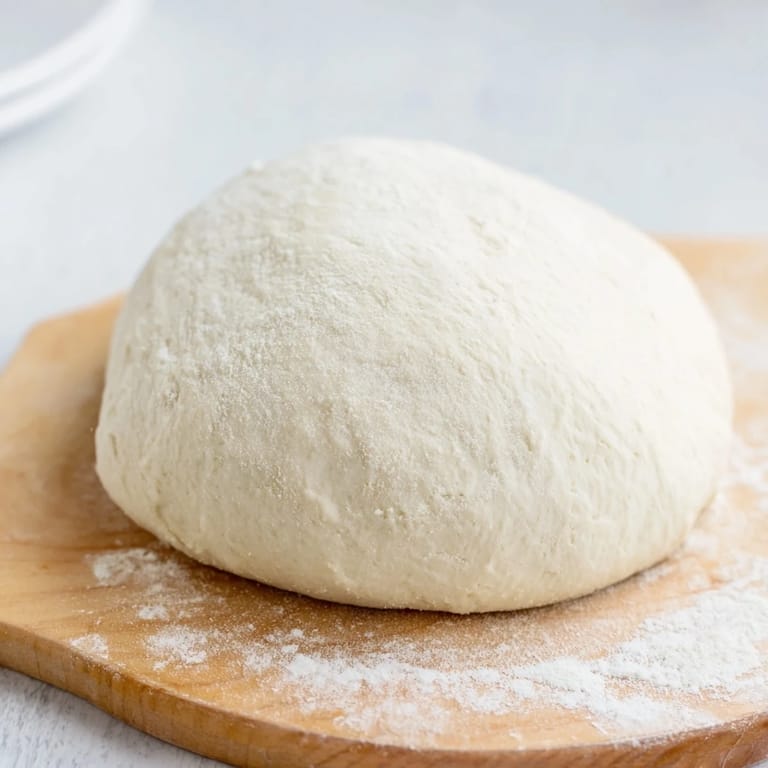
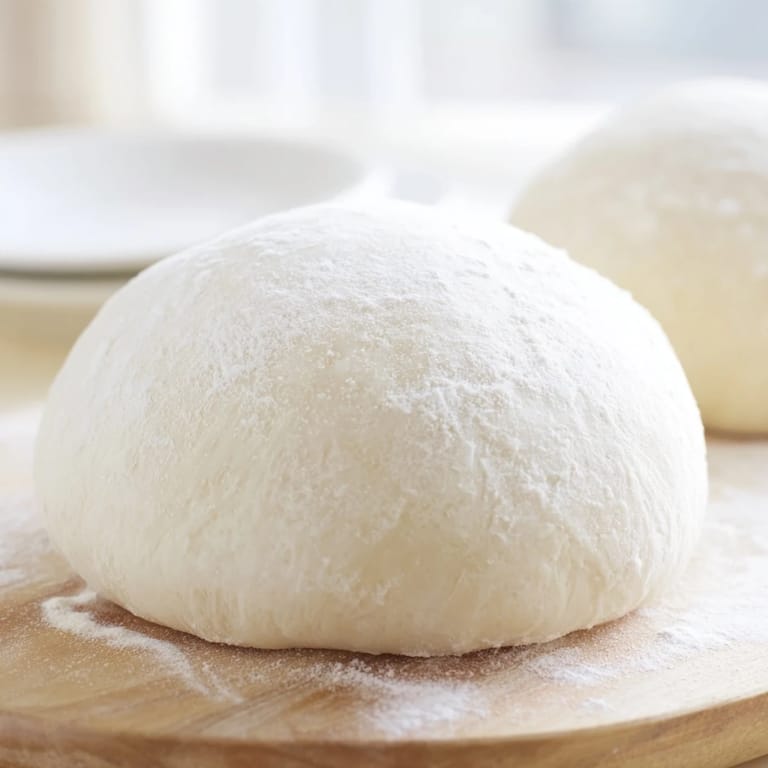
- Turn the dough out onto a lightly floured surface. Start kneading with the heel of your hand, folding the dough back over itself, rotating it a quarter turn, and repeating. After about 8 to 10 minutes, something magical happens—the dough transforms from rough and sticky to smooth and elastic. You'll feel it happen under your hands. If it's too sticky, dust with a tiny bit more flour, but don't overdo it.
- Let it rest and rise:
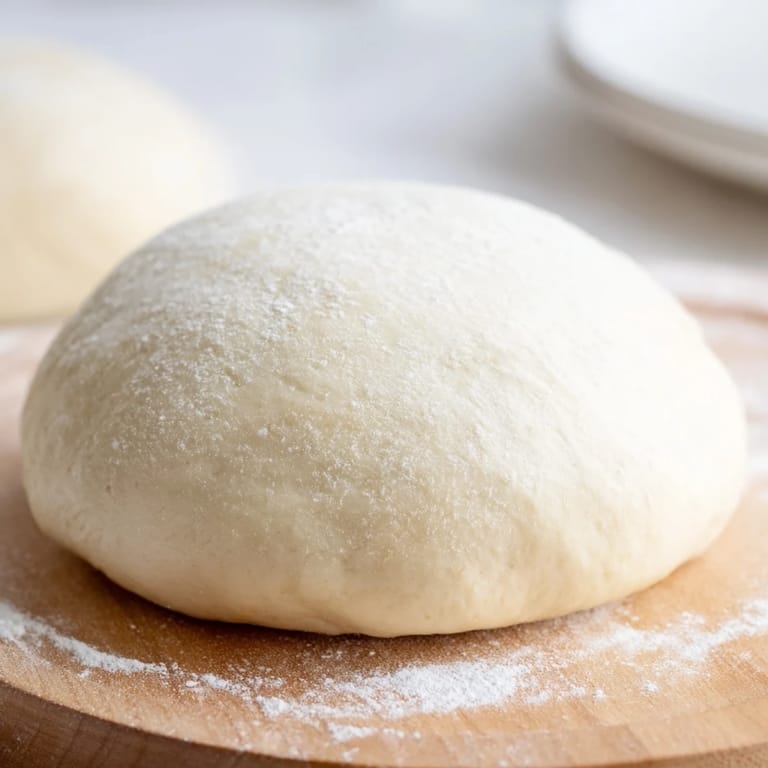
- Place your smooth dough into a lightly oiled bowl, turning it so the oil coats all sides. Cover it with a damp kitchen towel or plastic wrap. Find a warm, draft-free spot in your kitchen—maybe near the oven or a sunny window. Let time do its work. In 1 to 2 hours, it'll double in size, becoming puffy and full of air bubbles. This is the real transformation.
- Punch it down:
- After it's risen, gently press your fist into the center of the dough, letting the air escape with a satisfying deflate. This doesn't hurt the dough; it actually redistributes the yeast and helps it develop flavor. It's therapeutic, too.
- Divide and shape:
- Split the dough into two equal portions using a bench scraper or knife. Gently shape each piece into a ball by pulling the edges underneath, creating tension on the surface. These don't need to be perfect—pizza dough is forgiving. Place them seam-side down on your work surface.
- Give them a breather:
- Cover your dough balls with a towel and let them rest for 10 to 15 minutes. This allows the gluten to relax, making them much easier to stretch and shape in the next step.
- Shape and top:
- On a lightly floured surface, gently flatten each ball and stretch it into your desired thickness. If it springs back, let it rest a moment and try again. Transfer to a parchment-lined baking sheet or preheated pizza stone. Now comes the fun part—pile on your favorite toppings.
- Bake until golden:
- Preheat your oven to 475°F. Slide your pizza in and watch it transform over 12 to 15 minutes. You'll know it's ready when the crust is golden and crispy and the edges have that beautiful caramelized color. The aroma alone is worth the wait.
 Pin it
 There's something profoundly comforting about making pizza dough. Maybe it's the way your hands work the dough into submission, or the way your kitchen fills with that warm, yeasty smell. But I think it's really about the anticipation—knowing that in a couple of hours, you're going to pull something beautiful and delicious from your oven. That's not just cooking; that's creating something that brings people to the table.
Why Fresh Dough Changes Everything
There's a difference you can taste and feel between homemade dough and anything else. The crust has personality—it's chewy in some spots, crispy in others, with an aroma that frozen dough simply can't match. When you make it yourself, you control every variable. You know exactly what went into it. There's a pride in that, and honestly, your family will taste it.
Making It Your Own
This recipe is a foundation, not a rulebook. Once you've made it a few times and understand how the dough behaves, you can start experimenting. Try adding garlic powder to the dough itself, or a pinch of dried herbs. Some people swear by a tiny splash of honey instead of sugar. The beautiful thing about pizza dough is that it's incredibly adaptable. You can substitute up to a quarter of the bread flour with whole wheat flour for a nuttier flavor and more fiber. You can even make half the batch with regular flour and half with whole wheat to ease into the change.
Storing and Freezing Your Dough
One of my favorite discoveries was learning that pizza dough actually improves after it's been frozen. After the first rise, divide your dough into portions, wrap them tightly in plastic wrap, and freeze. Thaw overnight in the refrigerator before using. The cold, slow thaw develops deeper flavor—it's like the dough is getting better while you're not paying attention. You can keep frozen dough for up to three months, which means homemade pizza is always within reach.
- A preheated pizza stone makes the bottom crust crisper and more evenly cooked than a regular baking sheet
- If you don't have a pizza stone, place your baking sheet in the oven while it preheats—the hot surface makes a real difference
- Stretch your dough gently; forcing it creates weak spots that tear. Let it relax between stretches if you're having trouble
 Pin it
 Making pizza dough from scratch is simpler than you think, but it feels like an accomplishment every time. Once you master this recipe, you'll understand why your favorite pizzeria guards theirs so carefully.
Recipe FAQs
- → What type of flour works best for this dough?
Bread flour is ideal as it provides the gluten needed for a chewy texture, but whole wheat can be mixed in for extra flavor and fiber.
- → How important is the dough rising time?
Allowing the dough to rise 1–2 hours ensures it doubles in size, improving texture and flavor by developing the yeast activity.
- → Can I prepare the dough in advance?
Yes, extra dough can be frozen after the first rise and thawed overnight in the refrigerator for later use without loss of quality.
- → What temperature should I bake the dough at?
Bake at a high temperature around 475°F (245°C) to achieve a golden, crisp crust in 12–15 minutes.
- → Does using a pizza stone make a difference?
Yes, baking on a preheated pizza stone absorbs moisture and distributes heat evenly, resulting in a crispier crust.