 Pin it
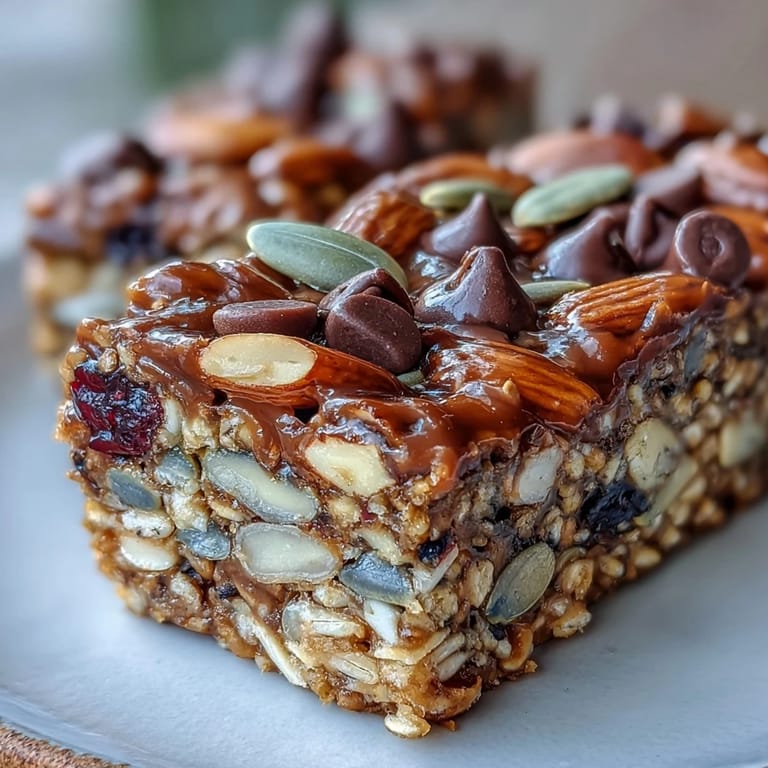
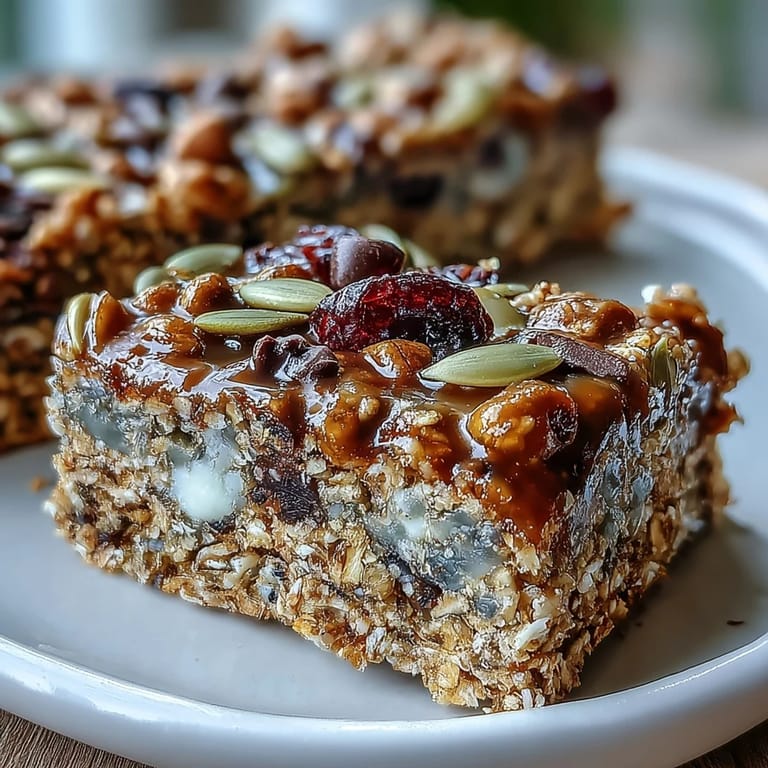
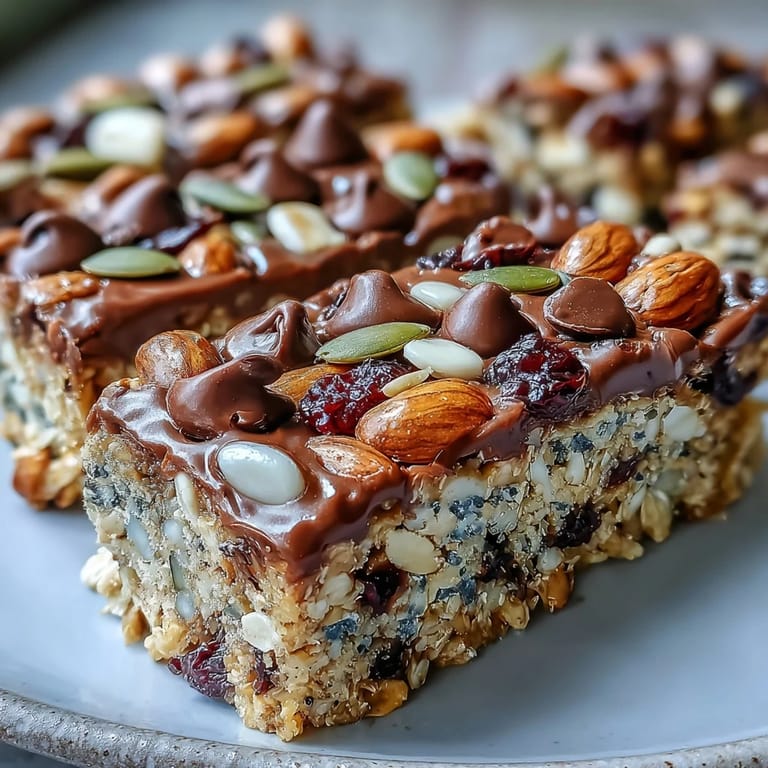
 The first time these nut-free granola bars emerged from my oven, the coconut's sweet aroma mingled with honey in the air, prompting my toddler to peek into the kitchen and ask if it was cookie day. The recipe came alive more out of necessity than nostalgia, sparked by the hunt for a portable snack that everyone could share during a beach trip—no nut worries required. Bits of seeds scattered on the counter were evidence of an afternoon where measuring cups doubled as toys. I've since found that even a midweek batch feels like a small victory when lunchboxes need filling. It's a forgiving, cheerful bar that always seems to disappear faster than I expect.
One sunny Saturday, I prepped a pan of these bars to take to a family picnic—a moment that could have been chaos, but everyone gathered around and debated cranberry versus chocolate chip, laughing and sneaking tastes while the bars cooled. It turns out even cousins with conflicting tastes can unite over something simple and homemade. After slicing, a sticky honey finger war broke out, which only ended when someone suggested sprinkling extra coconut on top as a peace offering. I still remember how the beach breeze seemed to amplify the cinnamon scent as we opened the container. Those granola bars were gone before the sandcastles even dried.
Ingredients
- Old-fashioned rolled oats: Oats set the chewy foundation and I always use rolled for texture—quick oats just don't hold together as well.
- Unsweetened shredded coconut: The coconut brings a subtle sweetness and toasting it beforehand deepens the flavor beautifully.
- Pumpkin seeds (pepitas): These add color and crunch—look for hulled pepitas to avoid surprise shell bits.
- Sunflower seeds: Mild and nutty without the nuts, these help bind the bars and roast up crisp.
- Dried cranberries or raisins: Chopping them lets the sweetness distribute throughout—cranberries add a tang while raisins bring earthiness.
- Mini chocolate chips (optional): These melt a little during baking and become delightful pockets; use dairy-free if needed.
- Fine sea salt: Just a pinch brightens every flavor—don't skip it.
- Ground cinnamon: This lifts the aroma, especially when baking, making the bars feel cozy.
- Honey: The glue and sweetness; good quality honey makes a big difference in depth.
- Sunflower seed butter or tahini: Smooth, creamy, and allergy-friendly, this helps hold everything together and enriches flavor.
- Coconut oil (melted): Helps keep the bars moist and easy to slice; measure after melting.
- Pure vanilla extract: Adds warmth and balances the sweetness—never skip for homemade granola bars.
Tired of Takeout? 🥡
Get 10 meals you can make faster than delivery arrives. Seriously.
One email. No spam. Unsubscribe anytime.
Instructions
- Prepare Your Pan:
- Line your square baking pan with parchment, leaving flaps for pulling out after baking. This step makes cleanup a breeze and ensures the bars release without crumbling.
- Mix All Things Dry:
- Combine oats, coconut, seeds, fruit, chocolate chips, salt, and cinnamon in a big bowl—let the kids help toss everything together and listen for the crunchiness as you stir.
- Create the Melty Magic:
- Warm honey, sunflower seed butter or tahini, coconut oil, and vanilla together in a small saucepan, stirring gently until it smells sweet and nutty and everything looks glossy.
- Bring It Together:
- Pour the warm mixture over the dry bowl and use a sturdy spatula to coat every oat; you want every bit sticky and shiny without dry pockets.
- Pack and Shape:
- Scoop the mixture into your prepared pan, spreading it evenly and pressing firm—use the back of a measuring cup to compact so the bars stay together after slicing.
- Bake to Golden:
- Slide into your preheated oven and bake 20–25 minutes, until edges turn golden brown and you catch the toasty coconut aroma—don't wander far, the scent is your timer.
- Cool and Slice:
- Let the bars rest in the pan until fully cool, then lift out using parchment flaps and cut into twelve tidy rectangles; the trick is a sharp knife and patience while cooling.
- Store for Snacking:
- Keep bars in an airtight container at room temperature for up to a week, or in the fridge for when you want extra chewiness and longer shelf life.
 Pin it
 The bars became a go-to road trip snack one summer, thanks to their stubborn durability (even after being forgotten at the bottom of my backpack). Biting into one after a swim felt like a reward, and hearing my husband note how "they taste like sunshine" still makes me smile. Sometimes, the simplest recipes sneak up and become tradition when you're not even looking. These bars have that quiet staying power. It just takes a few ingredients, a bit of mixing, and people always want seconds.
Swapping Ingredients For Fun
Experimenting with different mix-ins is half the fun, and I often empty every stray bag of dried fruit or seed from the cupboard to make each batch a little different. Swapping honey for maple syrup gives a hint of caramel, and tahini instead of seed butter brings a gentle sesame flavor. If allergies are a concern, always double-check labels—surprising hidden nuts sometimes lurk in store-bought dried fruit or chocolate chips. Dairy-free versions work well, but the bars stay chewier if you use coconut oil as your fat. Rolling the bars in extra coconut flakes before storing makes for a pretty finish and adds extra bite.
How To Get Perfect Chewy Texture
The key to that chewy, almost satisfying bite is in the pressing—don't be shy about packing the mixture down as firmly as you can. I once used a glass to really flatten things out and ended up with bars sturdy enough to survive a hiking day. Warm, sticky honey binds everything but only if you coat each oat well. If your mixture feels dry, drizzle in a bit more melted coconut oil. And if you want crisp edges, leave the bars in the pan for an extra five minutes after baking!
Granola Bar Troubleshooting And Storage
Sometimes bars can turn out a bit crumbly, especially if you skimp on the wet binding ingredients or rush the pressing step. Letting them cool completely is my favorite patience test, but it's totally necessary for solid slices. If your bars soften after a few days, pop them in the fridge; the colder temperature brings back chewiness and keeps them fresh. Don't forget parchment paper for separating layers so they don't stick together.
- If chocolate chips are used, sprinkle some on top before baking for a pretty look.
- For firmer bars, add an extra tablespoon of sunflower seed butter.
- Always pack bars tightly for clean cuts—they hold up best if shaped firmly.
 Pin it
 These granola bars bring a little joy to busy days, and they turn snack time into something special. Try a batch, and you may find yourself making them for every adventure—big or small.
Recipe FAQs
- → Can I use maple syrup instead of honey?
Yes, maple syrup or agave nectar can replace honey for a vegan-friendly version with similar sweetness.
- → Are these bars crunchy or chewy?
The bars are primarily chewy, but you can toast the oats and seeds beforehand for extra crunch.
- → What mix-ins can I add?
Feel free to add other dried fruits, seeds, or dairy-free chocolate chips to personalize the flavor.
- → How long do the bars stay fresh?
Stored in an airtight container, they last up to a week at room temperature or longer if refrigerated.
- → Is coconut considered a nut in allergy terms?
Coconut is classified as a tree nut for some individuals. Always check allergens and ingredient labels carefully.
- → Are these suitable for vegetarians?
Yes, the bars are vegetarian and can easily be adapted for vegan diets by substituting honey.