 Pin it
 My first pelmeni came from a neighbor who worked at a Russian bakery, pressed into my hands still warm from her kitchen. She showed me how to fold them—half-moon, then the corners kissed together—and I've been chasing that same tender, pillowy feeling ever since. There's something almost meditative about making these by hand, the dough soft under your fingertips, the filling seasoned just right so every bite tastes like comfort. What started as watching her work became my own small ritual on quiet weekends.
I made these for my roommate on a snowy evening, and watching her face light up when she tasted them—that moment when she realized they were homemade—made me understand why pelmeni show up at Russian tables year after year. The simplicity of boiling water, a few minutes of waiting, and suddenly you're serving something that feels both humble and celebratory.
Ingredients
- All-purpose flour (2 cups): The foundation of everything—use a light hand when measuring so your dough stays tender rather than tough.
- Cold water (1/2 cup): Cold is the secret; it keeps the dough elastic and forgiving as you work it.
- Large egg: Binds the dough and gives it structure without making it heavy.
- Salt (1 tsp total): Split between dough and filling—essential for flavor in both layers.
- Ground pork and beef (7 oz each): The combination gives you richness from the pork and deeper flavor from the beef; don't skip either one.
- Small onion, finely grated: Grating releases the onion's moisture, which keeps the filling from drying out as it cooks.
- Garlic (2 cloves, minced): Just enough to whisper in the background, not overpower.
- Black pepper (1 tsp total): Fresh cracked makes a difference; pre-ground fades by the time you finish kneading.
- Cold water for filling (2 tbsp): This small amount of liquid is crucial—it keeps the meat mixture sticky and tender once cooked.
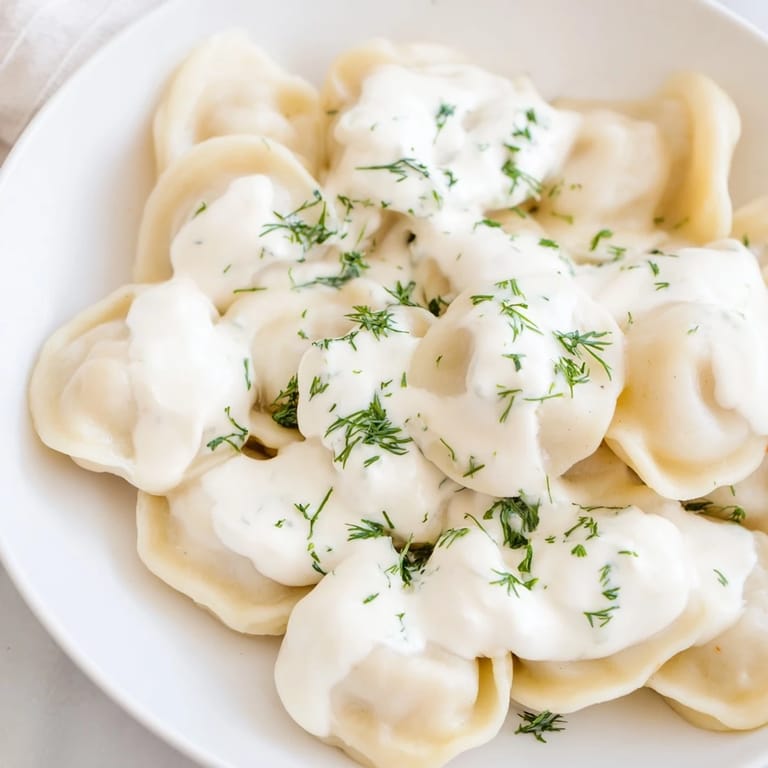
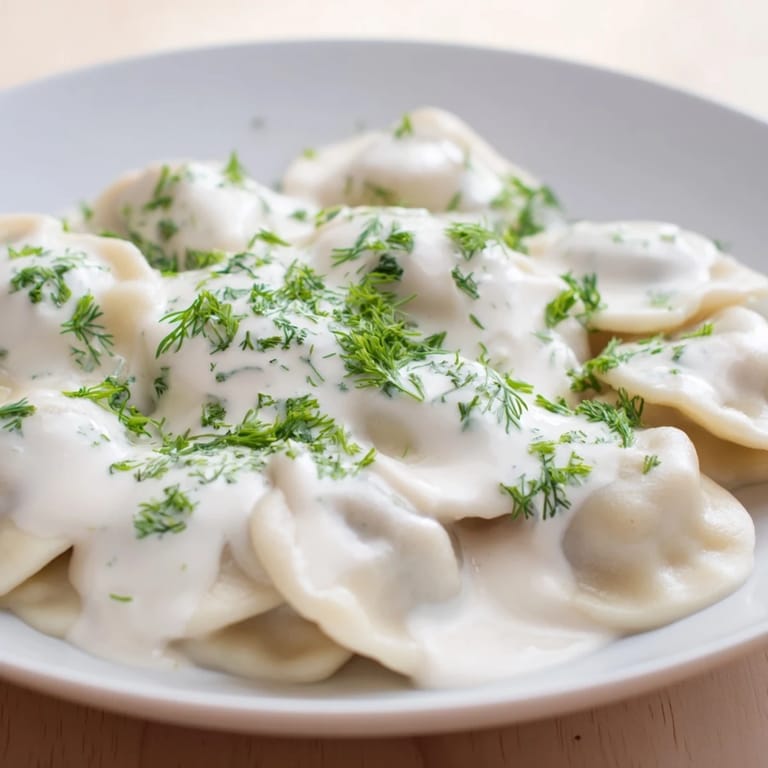
- Sour cream (1 cup): Serve it cold right from the fridge; it's the cooling contrast that makes each bite sing.
- Fresh dill (1 tbsp, chopped): Optional, but worth it—adds brightness that cuts through the richness.
Tired of Takeout? 🥡
Get 10 meals you can make faster than delivery arrives. Seriously.
One email. No spam. Unsubscribe anytime.
Instructions
- Mix the dough:
- Combine flour and salt in a bowl, then add the egg and cold water gradually. Knead for 8–10 minutes until the dough shifts from shaggy to smooth and elastic—you'll feel the change under your hands. It should be slightly sticky but not wet.
- Rest the dough:
- Cover with plastic wrap and let it sit for 20 minutes at room temperature. This rest is where the magic happens: the gluten relaxes and the dough becomes almost silky to roll.
- Prepare the filling:
- Mix both meats with grated onion, garlic, salt, pepper, and cold water in a bowl until everything is sticky and well combined. The water is what keeps the filling tender once it's cooked; don't skip it.
- Roll out thin:
- On a lightly floured surface, roll the dough as thin as you can manage—about 2 mm thick is the target. If it keeps shrinking back, let it rest for a minute and try again.
- Cut and fill:
- Use a 2.5-inch round cutter to make circles. Place about a teaspoon of filling in the center of each circle—too much and they'll burst, too little and they'll feel empty.
- Shape into pelmeni:
- Fold each circle in half to form a half-moon, pinching the edges tightly to seal. Then bring the two corners together and pinch them—this gives you the signature shape and ensures nothing leaks during cooking.
- Boil and serve:
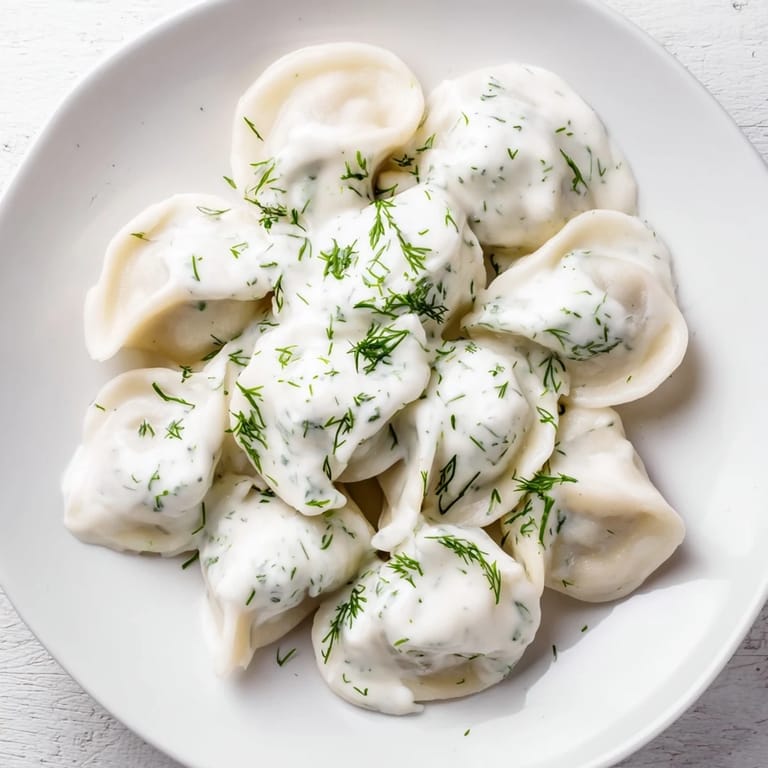
- Bring a large pot of salted water to a rolling boil. Drop pelmeni in batches so they have room to move around, stirring gently once or twice to prevent sticking. They're done when they float and the filling is cooked through, about 5–7 minutes. Serve immediately with a generous dollop of sour cream and fresh dill.
 Pin it
 There was a moment when my friend bit into one and closed her eyes, and I realized that pelmeni aren't just dinner—they're an edible memory, something that connects you to kitchens thousands of miles away. Every time I make them, I think of my neighbor, and the chain keeps going.
The Freezer is Your Friend
Make a double batch and freeze the extras before cooking—they'll keep for three months and cook just as well straight from the freezer. There's something deeply satisfying about knowing you have homemade dumplings waiting in your freezer, ready to rescue a tired evening. I often freeze them on a tray, then transfer to a bag once solid, so they don't stick together in one giant clump.
Variations and Add-Ons
The basic pelmeni are perfect as-is, but small changes can shift the whole mood. A pinch of nutmeg in the filling adds warmth and depth that surprises people who think they know what pelmeni taste like. Some days I serve them with melted butter and vinegar on the side, which is more traditional than sour cream, and it brings out the meat in a different way. You could also mix in a little fresh parsley or chives with the sour cream sauce if you want something brighter.
Timing and Serving
The whole process takes about an hour from start to finish if you're not rushing, which gives you time to set a nice table or just breathe a little. Pelmeni taste best served immediately while they're still steaming, the sour cream melting slightly into the creases of the dough. They're forgiving enough for a weeknight dinner but impressive enough to serve when someone special is coming over.
- Don't let the boiled pelmeni sit in the pot longer than a minute after they float; they'll get waterlogged if you do.
- If you're making them ahead, lay them on a parchment-lined tray and refrigerate until serving—they keep for a day or two.
- The sour cream should be cold straight from the fridge; it's the temperature contrast that makes the dish complete.
 Pin it
 These dumplings are proof that the best food doesn't require fancy techniques or rare ingredients—just care, time, and a willingness to fold something small and imperfect into something nourishing. Make them once, and you'll understand why they've survived generations.
Recipe FAQs
- → What type of meat is best for pelmeni filling?
A mixture of ground pork and beef provides a balanced flavor and texture, making the filling juicy and savory.
- → How thin should the dough be rolled?
The dough should be rolled to about 1/16 inch (2 mm) thickness for a tender yet sturdy wrap around the filling.
- → What is the traditional way to shape pelmeni?
Cut dough circles about 2.5 inches in diameter, place filling in the center, fold to form half-moons, and pinch edges tightly to seal.
- → How can I prevent pelmeni from sticking during cooking?
Drop pelmeni gently into boiling salted water and stir occasionally to keep them from clumping together.
- → What is a common sauce served with pelmeni?
Sour cream, often mixed with fresh dill and seasoned with salt and pepper, is traditionally served atop pelmeni.