 Pin it
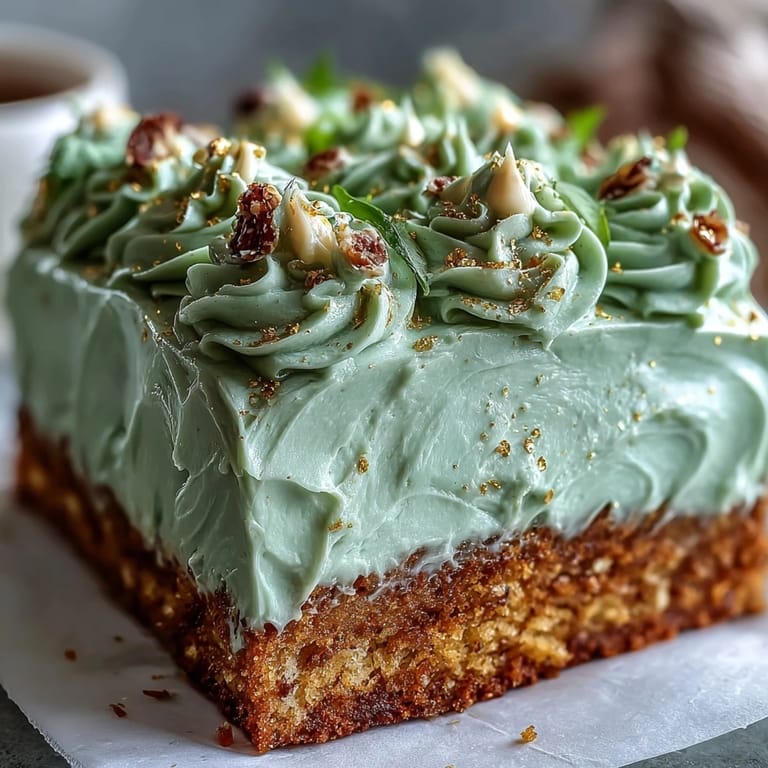
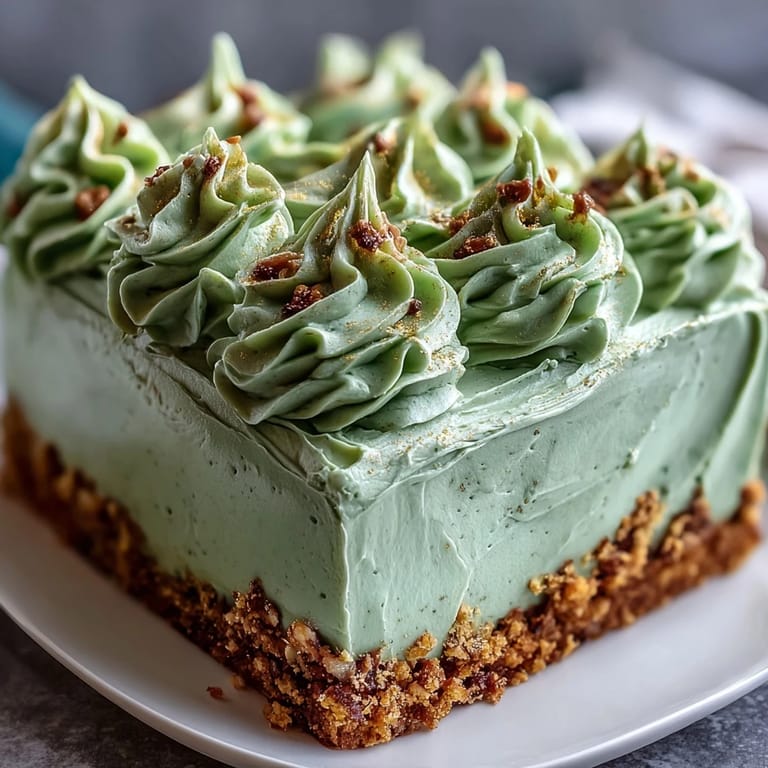
 The scent of sweet vanilla drifting through the house always sparks a little celebration inside me, but the first time I went for a sage green and gold buttercream, even the kitchen seemed to stand up a little taller. There’s something about carefully swirling those gentle, fresh tones over a soft, airy cake that made the project feel downright elegant. A crack of laughter over spilled luster dust, a gold shimmer on my wrist—this cake turned from an idea into a milestone. Baking can be ordinary, but sometimes the little details tip it right into the territory of occasion. This time, the cake became the kind of centerpiece that lingered on every phone and memory long after the plates were cleared.
It was a bright, bustling afternoon when I whipped this up for my cousin’s graduation. My niece perched on a stool, cautiously dipping her pinky into buttercream and giggling, while a pile of wrinkled parchment scraps grew beside us with each new piping test. The clatter and chatter of family mingled with faint vanilla rising from the oven, and I realized how much a homemade cake can tether us all together, especially for a milestone like this. By the time the last gold accent went on, we were already planning more reasons to gather around this cake.
Ingredients
- All-purpose flour: Sift it well for a tender crumb—too packed, and your cake won’t be as fluffy as you deserve.
- Baking powder: This is what gives your cake its lift, so check that yours isn’t expired for the best rise.
- Salt: Just enough salt will balance the sweetness and help flavors pop.
- Unsalted butter: Room temperature butter is easier to cream to that dreamy, airy texture, so don’t rush here.
- Granulated sugar: Provides sweetness and also helps create a soft, fine crumb structure when whipped with butter.
- Large eggs: Bring them to room temp; cold eggs can cause curdled batter, which always makes me wince.
- Pure vanilla extract: This is where depth of flavor comes from; real extract makes everything feel more celebratory.
- Whole milk: For a plush, rich crumb – and it keeps everything from drying out, especially in a sheet pan cake.
- Powdered sugar: Sift thoroughly for cloud-like buttercream; lumps are the enemy of smooth finishes.
- Heavy cream or milk: Adjusts your frosting’s consistency so you can spread or pipe with ease.
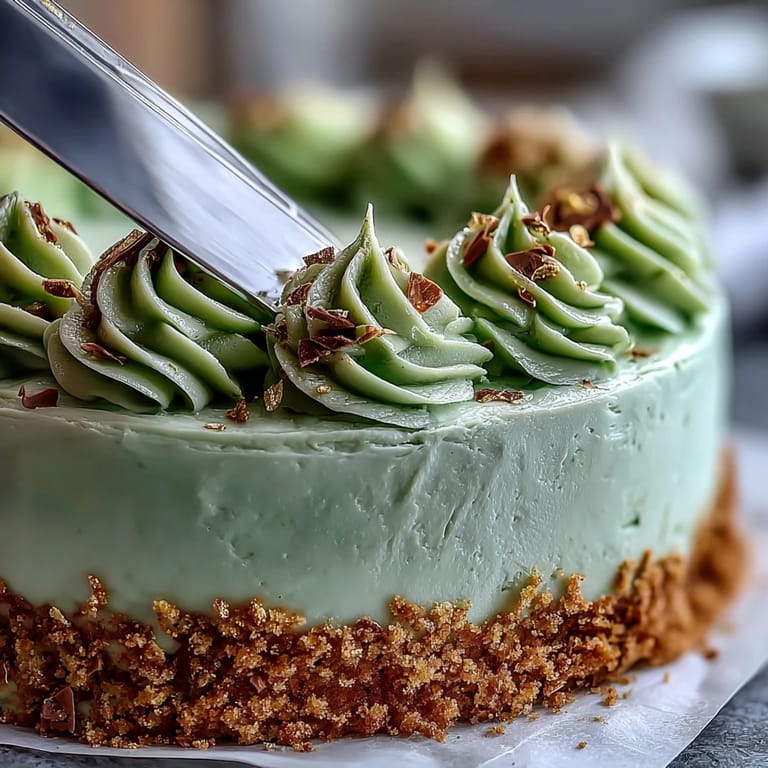
- Sage green gel food coloring: Gel gives deep color without thinning the buttercream, so use a toothpick swirl at a time for control.
- Gold edible luster dust: Just a touch transforms simple decorations; mix with vanilla or vodka for a bold paint-on finish.
- Clear vanilla extract or vodka (optional): Helps activate luster dust for brushing on those gleaming details.
Tired of Takeout? 🥡
Get 10 meals you can make faster than delivery arrives. Seriously.
One email. No spam. Unsubscribe anytime.
Instructions
- Preheat and Prep:
- Set your oven to 350°F (175°C) and line a 12×18 inch pan with parchment so you can lift the cake easily later.
- Whisk the Dry Ingredients:
- In a medium bowl, lightly whisk your flour, baking powder, and salt—listen for that soft shush as the powders mix.
- Cream Butter and Sugar:
- In a large bowl, beat the butter and sugar until it transforms into something nearly white and impossibly fluffy—it should look like frosting itself.
- Add Eggs & Vanilla:
- Beat in eggs, one at a time, watching the mix become glossy after each, then add your vanilla for an early ribbon of perfume.
- Alternate Dry and Wet:
- Working gently, fold in the dry mixture in thirds, alternating with milk—begin and end with flour, stopping as soon as it’s smooth.
- Bake to Golden:
- Pour batter into your pan, even the surface, and bake for 28–32 minutes, until a toothpick comes out clean and the top springs back like a trampoline.
- Cool the Cake:
- Let the cake cool completely in the pan on a rack—impatience is the enemy of neat frosting.
- Make the Buttercream:
- Beat butter until creamy, then add powdered sugar gradually; finish with vanilla, salt, and a bit of cream for smooth pipeable frosting.
- Tint & Reserve:
- Stir sage green coloring into most of your buttercream, reserving ½ cup for your future golden brushwork.
- Frost and Decorate:
- Spread your sage green buttercream in satisfying, sweeping waves; use a piping bag for extra crisp graduation motifs.
- Gold Accents Magic:
- Mix luster dust with clear vanilla or vodka and brush or pipe over details—let your hand tremble, it just looks more human.
- Finishing Touches:
- Scatter gold sprinkles, pipe graduation hats or scrolls, and admire your handiwork before the proud slicing begins.
 Pin it
 The day I carried this cake out to a backyard table, sunlight flickered over the gold swirls and every conversation paused to take it in. It was the first time I realized what a little attention to detail (and a bold sweep of color) could do for a rite of passage dessert—we sliced it together, and the celebration felt somehow both grown-up and playful at the same time.
How to Get that Perfect Sage Green
Gel food coloring is the real game changer here—it’s vivid and strong, so always swirl in a little at a time, adjusting under natural light if possible. When you reach just the right hint of gray-green, take a moment to pause and feel that quiet satisfaction. If your color goes too dark, you can mellow it out by folding in extra white buttercream, which I learned in a last-minute, slightly panicked kitchen fix.
Decorating Like a Pro, Even if You Aren't
You don’t need advanced piping skills for a showstopper effect—an offset spatula and the back of a spoon can create gorgeous natural texture. I blot extra buttercream off my piping tips before switching colors, which saves decorations from becoming marbled hugs (unless that’s your style). When painting on gold, let each accent dry for a few minutes before adding another layer for a bolder shine.
Timing Your Bake for Graduation Day
Making the cake a day ahead is a lifesaver; everything chills, the flavors meld, and slices come out pristine after a stay in the fridge. If you add decorations right before the party, the gold is at its shining best and the buttercream stays bright.
- If you’re short on time, store-bought gold sprinkles do the trick in a pinch.
- Enlist a friend to help with piping—kitchen chaos turns into laughter when shared.
- Knife cleaning between slices gives you those photo-ready cake squares worth celebrating.
 Pin it
 Here’s to every reason that brings us around the table—especially when it’s for a sage and gold cake that shimmers as much as the moment. Enjoy the baking, the celebration, and all those sneaky tastes along the way.
Recipe FAQs
- → How do I get an even sage green color?
Use concentrated gel food coloring and add it a drop at a time to the buttercream, mixing thoroughly between additions. Gel gives deeper color without thinning the frosting; allow the tinted buttercream to rest briefly to let the hue settle before final adjustments.
- → What’s the best way to create gold accents?
Mix edible gold luster dust with a few drops of clear vanilla extract or vodka to make a paint, then brush onto piped details. For a softer look, gently fold luster dust into reserved buttercream to create a marbled gold effect.
- → How can I ensure the sheet bakes evenly?
Use room-temperature ingredients, evenly spread batter in a lined 12×18 pan, and avoid overmixing. Bake in the center of a preheated 350°F oven and check for doneness at 28 minutes with a toothpick; rotate the pan if your oven has hot spots.
- → How should I store the finished cake?
Cover and refrigerate the cake for up to 3–4 days. Bring to room temperature for 30–60 minutes before serving to soften the buttercream and improve flavor. For longer storage, freeze individual slices wrapped tightly.
- → How do I keep piping details stable in warm conditions?
Chill the buttercream briefly before piping and work in a cool kitchen. If needed, add a little more powdered sugar to firm the consistency or refrigerate piped elements briefly before adding gold paint.
- → Can I make this with a gluten-free flour?
Use a 1:1 gluten-free flour blend that includes xanthan gum for best texture. Expect a slightly different crumb and monitor baking time; the batter may need a few extra minutes to set.