 Pin it
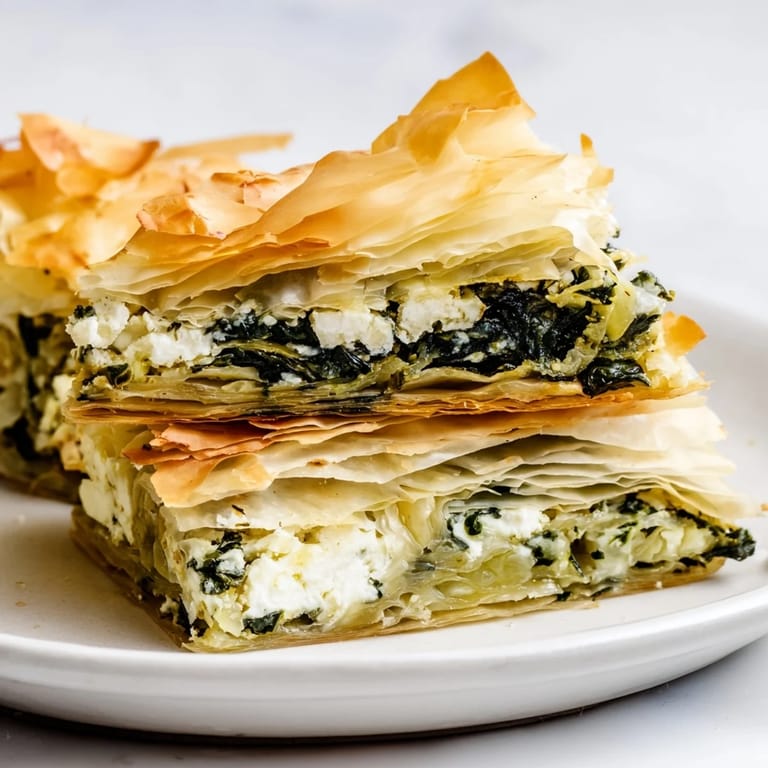
 The first time I made spanakopita, I was standing in my friend Maria's kitchen on a rainy Athens afternoon, watching her grandmother work with phyllo like it was second nature. She didn't measure anything, just layered and brushed with the kind of confidence that only comes from making something a thousand times. I went home determined to recreate that magic, and after a few crinkled sheets and one slightly burnt corner, I finally understood why this pie has been a Greek staple for generations. It's the way the crispy, golden pastry shatters between your teeth while the warm, herby spinach filling melts underneath.
I made this for a potluck once and watched it disappear before anything else on the table, even the desserts. Someone asked for the recipe, then another person, and I realized I'd created something people genuinely wanted to make themselves. That's when I knew spanakopita wasn't just a dish—it was a conversation starter.
Ingredients
- Fresh spinach (2 lbs) or frozen (1 lb thawed): Fresh spinach wilts down dramatically, so don't be alarmed by the volume—you'll end up with about a quarter of what you started with. Frozen spinach saves time, but squeeze it dry or your filling will be watery and sad.
- Yellow onion and scallions: The onion sweetens as it cooks, creating a gentle base, while scallions add a bright, sharp note that keeps the filling from feeling one-dimensional.
- Fresh dill and parsley: These herbs are not optional extras—they're what make spanakopita taste like itself. Fresh dill especially carries that distinctive Greek flavor that dried simply cannot capture.
- Feta cheese (8 oz): Crumble it by hand if you have time; it distributes more evenly through the filling than pre-crumbled, and you'll taste the difference.
- Ricotta or cottage cheese: This optional addition makes the filling creamy and luxurious, softening the sharp edges of the feta without overpowering it.
- Eggs (2 large): They bind everything together and give the filling structure so it doesn't turn into a runny mess once it hits the heat.
- Olive oil or melted butter (1/2 cup for phyllo): This is what creates those shattering, golden layers—don't skimp or use a lighter hand than directed, or you'll end up with something more bread than pastry.
- Phyllo dough (1 lb thawed): Let it thaw in the refrigerator overnight, never at room temperature, or it becomes sticky and impossible to work with.
Tired of Takeout? 🥡
Get 10 meals you can make faster than delivery arrives. Seriously.
One email. No spam. Unsubscribe anytime.
Instructions
- Get your oven ready and prep the stage:
- Preheat to 350°F and grease your 9x13-inch baking dish lightly. Have your phyllo sheets laid out on a damp kitchen towel—this keeps them from drying out and turning brittle before you even get them into the pie.
- Build the aromatic foundation:
- Heat olive oil in a large skillet and sauté your onion and scallions until they're soft and golden, about 5 minutes. The smell should fill your kitchen and make you hungry immediately.
- Wilt the spinach and let it cool:
- Add your chopped spinach in batches (if using fresh) and stir until it's wilted and the excess moisture has evaporated, roughly 8-10 minutes. This step matters more than you'd think—watery spinach ruins everything. Let it cool in the pan for a few minutes before moving on.
- Squeeze and combine your filling:
- Transfer the spinach to a colander and press gently with the back of a spoon to remove any lingering moisture. In a large bowl, combine the cooled spinach mixture with dill, parsley, crumbled feta, ricotta if using, beaten eggs, black pepper, nutmeg, and salt. Mix until everything is evenly distributed and the filling is cohesive.
- Layer the phyllo base:
- Lay one sheet of phyllo in the baking dish, letting the edges hang over the sides. Brush it generously with olive oil or melted butter, then repeat with 6-7 more sheets, brushing each one. You want each layer to be glossy and rich—this is what creates the crispiness.
- Spread the filling evenly:
- Once your phyllo foundation is built, spread the spinach-feta mixture across the top in an even layer. Don't worry about being perfectly neat; the top layers will cover any rough spots.
- Top with the final phyllo layers:
- Layer your remaining phyllo sheets on top, brushing each one with oil or butter just as you did with the base. When you get to the last sheet, brush it especially well—this becomes your golden, crispy crown. Tuck any overhanging edges into the sides of the dish so nothing burns or dries out.
- Score before baking:
- Using a sharp knife, score the top into squares or diamonds, cutting only through the phyllo layers, not all the way to the filling. This makes serving easier and looks intentional, like you knew what you were doing the whole time.
- Bake until golden:
- Bake for 35-40 minutes, until the top is deep golden and you can hear it crackling slightly when you move it. Let it rest for 10 minutes before cutting—this gives the filling time to set so your slices hold together beautifully.
 Pin it
 My grandmother always said that spanakopita was poor food made rich, a way to stretch vegetables into something that felt celebratory. Making it now, I understand what she meant—there's an honesty in taking simple ingredients and layering them with care until they become something extraordinary. It's comfort food that happens to be elegant, which might be the best kind.
The Phyllo Secret
The first time I worked with phyllo, I was terrified—the sheets felt impossibly fragile, and I was convinced I'd tear them all before I even got to the filling. But I learned that phyllo wants to be handled, not babied. A quick, confident brush of oil, a gentle lay into the dish, and suddenly those delicate sheets transform into something sturdy and golden. The key is understanding that each oiled layer builds strength; by the time you've layered eight, you have something surprisingly resilient.
Customizing Your Filling
While spinach is traditional, this pie is forgiving. I've made versions with Swiss chard, a mix of greens, even some kale stirred in at the end (though traditionalists might give me a look for that). The structure stays the same, and the herb ratios don't change, but the flavor shifts slightly depending on what greens you choose. The one thing I won't skimp on is the dill—that's non-negotiable. It's what makes it spanakopita and not just any savory pie.
Serving and Pairing
Spanakopita is a versatile player. I serve it warm as an appetizer, at room temperature as part of a spread, or cold the next day straight from the fridge. It pairs beautifully with a crisp white wine like Assyrtiko or Sauvignon Blanc, but honestly, it's just as happy with a simple Greek salad or some tzatziki on the side. The warm filling and cool, tangy accompaniments balance each other perfectly, creating a meal that feels both light and deeply satisfying.
- Serve it warm with tzatziki for an elegant appetizer or side.
- Cut it into smaller squares for a cocktail party, and watch them disappear.
- Make it a day ahead and reheat gently—spanakopita actually tastes better the next day when the flavors have settled.
 Pin it
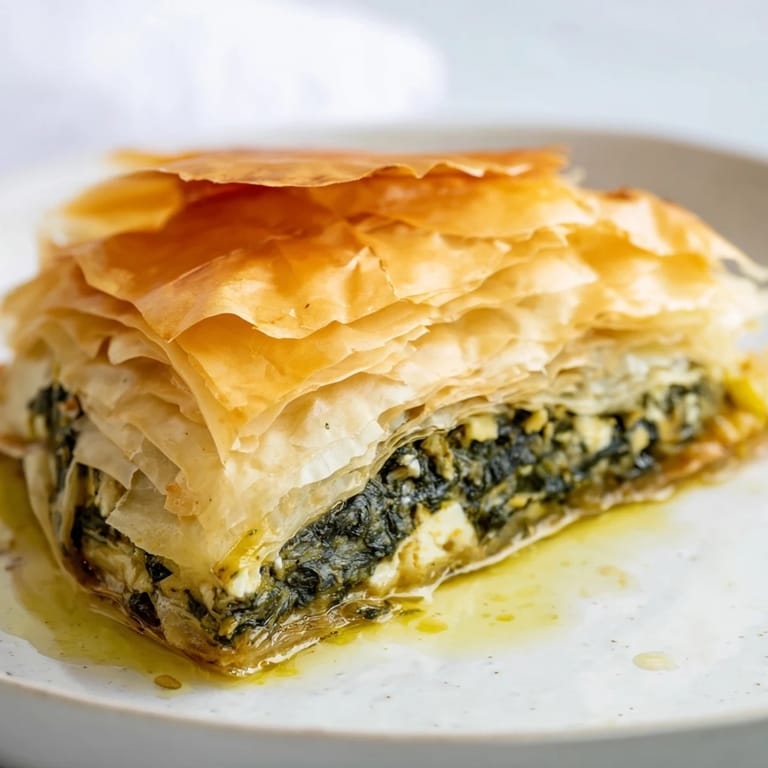
 There's something deeply satisfying about pulling a golden spanakopita from the oven, hearing it crackle as it cools, and knowing you've created something that tastes like it took hours when it really only took about an hour from start to finish. That's the real magic of this pie.
Recipe FAQs
- → What can be used instead of spinach?
Chard or a mix of leafy greens can substitute fresh spinach for a similar texture and flavor.
- → How can I make the pie crispier?
Brushing each phyllo layer generously with olive oil or melted butter helps achieve a crisp, flaky crust.
- → Can I use frozen spinach for the filling?
Yes, thaw and drain frozen spinach thoroughly to remove excess moisture before mixing with other ingredients.
- → Is it better to use feta alone or add ricotta?
Adding ricotta softens the filling, giving a creamier texture while feta adds a tangy bite—combining both balances richness.
- → What herbs enhance the filling’s flavor?
Fresh dill and parsley complement the spinach and feta beautifully, adding bright, aromatic notes.
- → How should the pie be served?
Allow it to cool slightly after baking, then cut into squares or diamonds for ease of serving.