 Pin it
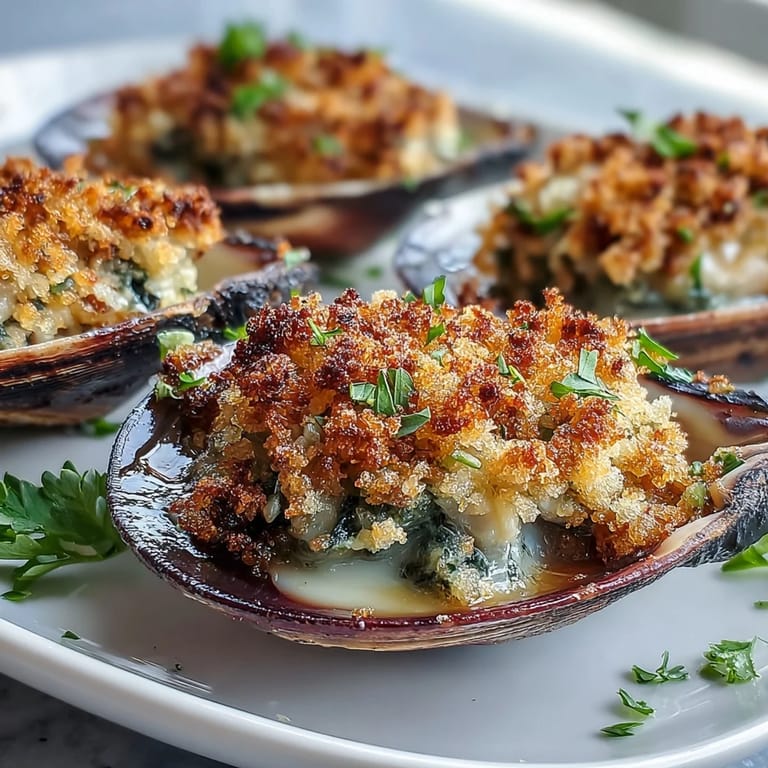
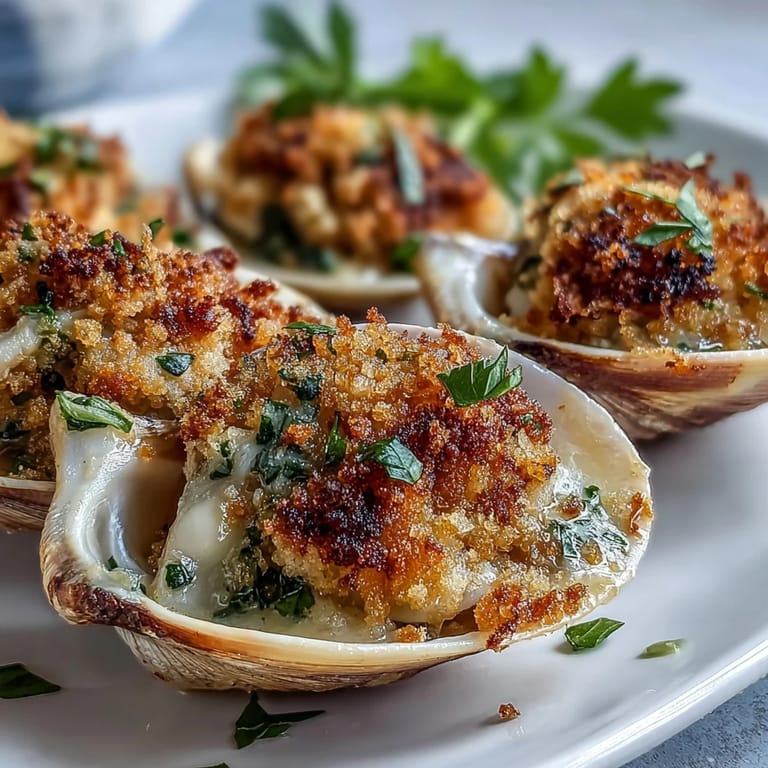
 My neighbor handed me a bucket of littlenecks one Saturday morning, still cold from the fish market, and I knew I had to do something better than my usual steam-and-butter routine. I'd seen roasted clams topped with golden, garlicky crumbs at a beachside restaurant years ago, and the memory stuck. The combination of tender clam meat and crunchy, lemony topping felt like the kind of dish that could turn a quiet evening into a small celebration. I dug out my clam knife, cleared the counter, and decided to figure it out. By the time the pan came out of the oven, the kitchen smelled like summer.
The first time I made these, I served them to friends who were used to my more predictable pastas and salads. They picked up the shells carefully, trying not to spill the juices, and I watched their faces shift from polite curiosity to real surprise. One of them said it tasted like a coastal bistro, which made me laugh because my kitchen overlooks a parking lot. But that's the thing about clams: they bring the ocean with them, no matter where you are. We finished every shell, scraping up stray breadcrumbs with our fingers, and someone asked if I'd made this before, as if I had a secret past as a seafood cook.
Ingredients
- Littleneck clams: Look for tightly closed shells, which means they're alive and fresh; discard any that stay open when you tap them, because they've already given up.
- Panko breadcrumbs: The Japanese style gives you that airy, crispy texture regular breadcrumbs just can't match, and they soak up butter without turning soggy.
- Unsalted butter and olive oil: The butter adds richness, while the oil keeps the crumbs from clumping; together, they create a coating that crisps beautifully in high heat.
- Garlic: Mince it fine so it melts into the topping rather than burning in spots, and use fresh, not jarred, for a cleaner flavor.
- Lemon zest: This is where the brightness lives; avoid the white pith underneath, which turns bitter and muddy.
- Fresh parsley: Flat-leaf Italian parsley has more flavor than the curly kind, and it adds a green, herbal note that balances the salt of the clams.
- Parmesan cheese: A small handful deepens the savory quality, but you can skip it if you want to keep things lighter or dairy-free.
- Kosher salt and black pepper: Season carefully, because the clams themselves bring plenty of natural brininess.
Tired of Takeout? 🥡
Get 10 meals you can make faster than delivery arrives. Seriously.
One email. No spam. Unsubscribe anytime.
Instructions
- Set up your oven and baking sheet:
- Preheat to 450°F and line a baking sheet with rock salt or crumpled foil to create little nests that keep the clam shells from tipping over. This step makes all the difference when you're trying to pile topping on wobbly half-shells.
- Scrub and inspect the clams:
- Rinse them under cold running water, scrubbing off any grit or sand with a stiff brush. Tap any open clams gently; if they don't close, toss them out because they're no longer alive.
- Shuck the clams:
- Slide a clam knife into the hinge, twist to pop it open, and run the blade along the inside of the top shell to release the muscle. Catch the juice in a bowl, loosen the meat from the bottom shell, and nestle everything back into one half-shell.
- Make the lemony panko topping:
- In a bowl, toss together panko, melted butter, olive oil, minced garlic, lemon zest, parsley, Parmesan if using, salt, and pepper until the crumbs are evenly coated and slightly clumpy. The mixture should look like damp sand, not dry flakes.
- Top each clam:
- Spoon about a tablespoon of the panko mixture over each clam, pressing lightly so it mounds up and stays put. Don't be shy; a generous pile makes for a better bite.
- Roast until golden:
- Slide the baking sheet into the hot oven and roast for 10 to 12 minutes, until the topping turns golden brown and the clam meat is just cooked through. Watch closely near the end so the crumbs don't burn.
- Serve hot:
- Transfer the clams to a platter, scatter extra parsley on top if you like, and serve with lemon wedges for squeezing. Eat them right away while the topping is still crunchy.
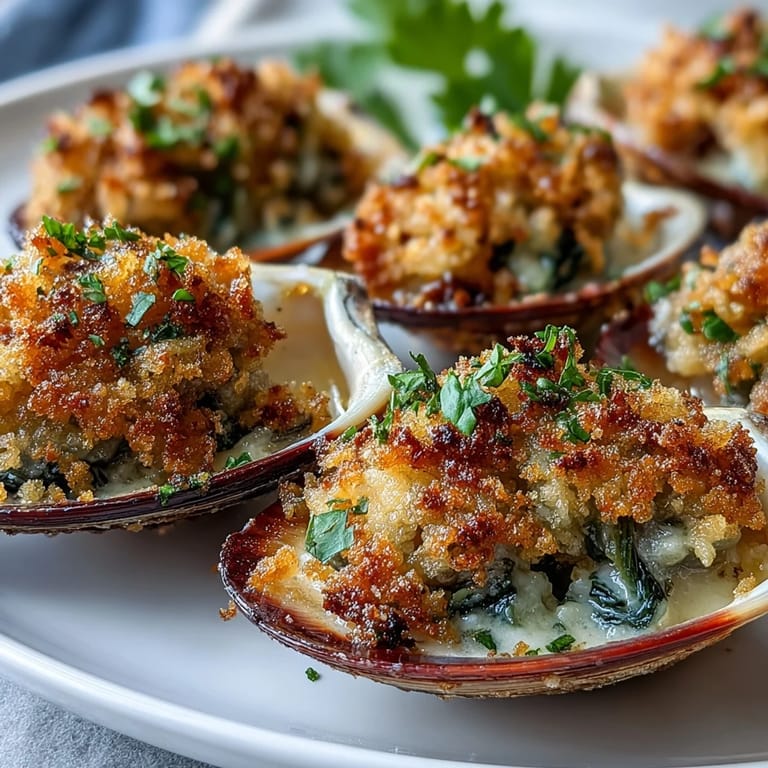 Pin it
 I made these again on a rainy Tuesday when I needed something to lift the mood, and the smell of garlic and lemon hitting the hot oven was enough to shake off the gray afternoon. My partner wandered into the kitchen, drawn by the scent, and we ate them standing at the counter, still too hot to handle properly. There's something about food that requires your hands, that makes you slow down and pay attention, that turns a regular meal into a small event. We didn't need candles or a fancy table; the clams did all the work.
How to Shuck Clams Without Losing a Finger
Shucking clams feels intimidating at first, but it's mostly about patience and the right tool. Use a proper clam knife with a blunt, rounded tip, not a sharp paring knife, which can slip and slice you. Hold the clam in a folded towel to protect your palm, insert the knife near the hinge, and wiggle gently until you feel it pop. Once you get the rhythm, it goes fast, and there's a small thrill every time the shell gives way. I used to be clumsy and slow, but now I can shuck a dozen in under ten minutes without breaking a sweat.
What to Serve Alongside
These clams shine as an appetizer, but if you're serving them as a main course, think about simple sides that won't compete for attention. A crisp green salad with lemon vinaigrette, crusty sourdough for soaking up any stray butter and clam juice, or roasted asparagus all work beautifully. I've also served them with a chilled pasta salad dressed in olive oil and herbs, which feels summery and light. Keep the rest of the meal minimal so the clams stay the star of the plate.
Storage and Make-Ahead Tips
Clams are best eaten fresh and hot from the oven, but you can prep parts of this recipe ahead to save time. Shuck the clams earlier in the day, cover them tightly, and refrigerate until you're ready to top and roast. The panko mixture can be made a few hours in advance and kept at room temperature, though it may need a quick stir before spooning. Leftovers don't reheat well because the topping loses its crunch, so plan your quantities carefully and try to finish them in one sitting.
- Store shucked clams covered in the fridge for no more than four hours before cooking.
- If you have extra panko topping, save it in an airtight container and use it on baked fish or roasted vegetables within two days.
- Frozen clams won't work for this recipe; the texture turns mushy and the flavor fades.
 Pin it
 This recipe taught me that elegant food doesn't have to be complicated, just thoughtful and well-timed. Every time I make these clams, I'm reminded that good cooking is often about honoring simple ingredients and not getting in their way.
Recipe FAQs
- → Can I use a different type of clam?
Yes, cherrystone or topneck clams work well. Adjust cooking time slightly based on size—smaller clams may need 8-10 minutes.
- → How do I know if clams are fresh?
Fresh clams should be tightly closed or close when tapped. Discard any with broken shells or those that remain open after tapping.
- → Can I prepare the topping ahead of time?
Absolutely. Mix the panko topping up to 4 hours in advance and refrigerate. Shuck clams just before roasting for best results.
- → What if I don't have a clam knife?
A sturdy paring knife can work, but use extreme caution. Wrap the clam in a towel for grip and safety while shucking.
- → How do I prevent the shells from tipping over?
Line your baking sheet with rock salt or crumpled aluminum foil to create stable nests that hold each shell level during roasting.
- → Can this be made gluten-free?
Yes, simply substitute gluten-free panko breadcrumbs. The flavor and texture remain excellent with this simple swap.