Pin it
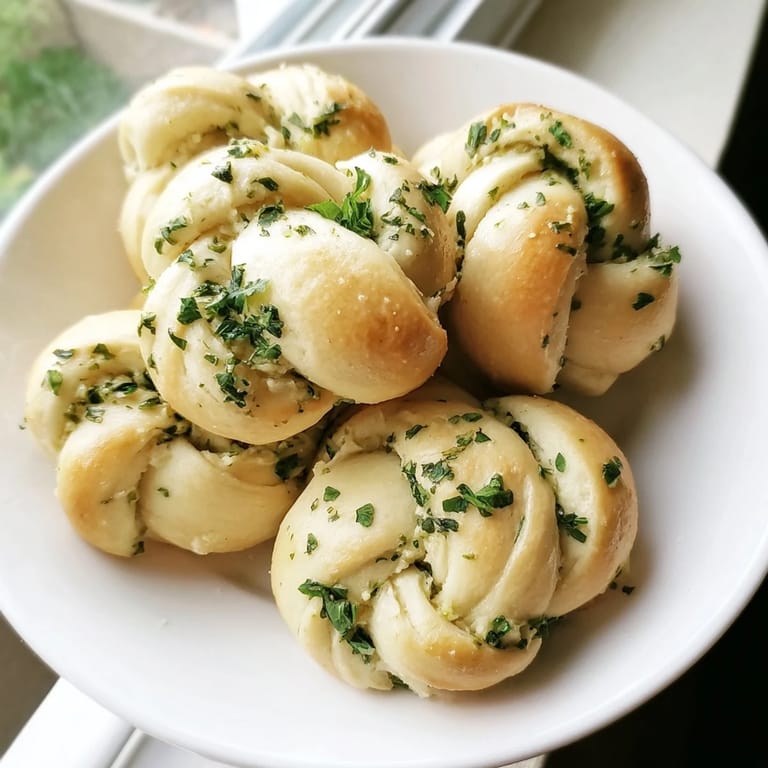
 I discovered garlic knots on a Friday night at a little Italian bakery tucked between a laundromat and a corner bodega in Brooklyn. I was supposed to bring an appetizer to a friend's dinner party, and I walked out with a warm paper bag of these golden, garlicky pillows that somehow tasted like comfort and celebration at the same time. That night, watching everyone's faces light up as they bit into the first one, I realized I had to learn how to make them at home. Now, whenever I knead this dough, I'm transported back to that moment—the smell of butter and garlic filling my kitchen, the softness of the warm knots in my hands, the anticipation of sharing them with people I love.
I remember making these for my sister's book club, and she called me the next day just to tell me that three people asked for the recipe. She saved one knot in her freezer for a week because she couldn't bear to eat it right away—she wanted to savor the moment when she'd need comfort food. That's when I understood: these aren't just appetizers. They're little gifts wrapped in garlic and butter.
Ingredients
- All-purpose flour (2 cups): This is your foundation. I learned to weigh it (250g) rather than scoop it straight from the bag—it makes a real difference in how tender your knots turn out. Scooping compacts the flour, which can make them dense.
- Instant dry yeast (1 tsp): This is the magic ingredient that makes everything rise and puff. Don't use old yeast—I once grabbed a packet that had been in my pantry for two years, and nothing happened. Fresh yeast is worth the extra dollar.
- Sugar (1 tsp): A tiny spoonful feeds the yeast and gives it energy to do its job. It's barely there, but it matters.
- Salt (3/4 tsp total): Flavor, but also control. Salt slows fermentation just enough to keep your dough from overproofing.
- Warm water (2/3 cup): The temperature matters more than you'd think. Warm means around 110°F—hot enough to activate the yeast, but not so hot that you kill it. If you're not sure, test it on your inner wrist like you're checking a baby's bathwater.
- Olive oil (2 tbsp): This makes the dough silky and gives the knots a tender crumb. Don't skip it thinking you'll brush them with butter later—the oil in the dough is different.
- Unsalted butter (1/4 cup): This is where the magic really happens. Good butter makes everything taste like home.
- Fresh garlic (3 cloves, minced): Fresh is non-negotiable here. The garlic powder will disappoint you. Mince it fine so it distributes evenly through the butter.
- Fresh parsley (2 tbsp, finely chopped): This brightens everything up and makes it look beautiful. I started adding it after tasting a batch without it and thinking something was missing.
- Parmesan cheese (2 tbsp, optional but really not optional): A little sprinkle of good Parmesan right after the butter hits the warm knots is the difference between good and unforgettable.
Tired of Takeout? 🥡
Get 10 meals you can make faster than delivery arrives. Seriously.
One email. No spam. Unsubscribe anytime.
Instructions
- Bring your ingredients together:
- In a large bowl, whisk together your flour, yeast, sugar, and salt. This seems simple, but mixing the yeast evenly with the flour is important—you want the yeast distributed so it works consistently throughout the dough. I use a fork to break up any lumps.
- Wake up the dough:
- Pour in your warm water and olive oil, and stir with a wooden spoon until everything comes together into what looks like shaggy bread crumbs—it won't be pretty yet, and that's exactly right. The dough will look rough and a little dry, and you might wonder if something went wrong. It hasn't.
- Knead until smooth:
- Turn your dough onto a lightly floured surface and knead for about 5 minutes. This is where you can feel the transformation happening—the dough starts sticky and slightly chaotic, then gradually becomes smooth and elastic. You'll know it's ready when it springs back gently when you poke it. Your hands will get a little sticky; that's part of the experience.
- Let it rest and relax:
- Cover your dough (I use a damp kitchen towel) and let it sit for 10 minutes. This is the gluten taking a breath. It makes the dough easier to shape and the final knots more tender. Use these 10 minutes to preheat your oven to 400°F and line a baking sheet with parchment paper.
- Shape your knots:
- Divide your dough into 12 equal pieces—I do this by eye, making them roughly the size of a golf ball. Roll each one into a rope about 6 inches long (it doesn't have to be perfect), then tie it into a simple knot. Some will look neater than others, and they'll all taste amazing. Place them on your baking sheet with a little space between each one—they'll puff up slightly as they bake.
- Let them bake until golden:
- Slide the baking sheet into your preheated oven and bake for 13 to 15 minutes. You're looking for a light golden brown—not pale, not dark. If your oven runs hot, start checking at 12 minutes. The kitchen will start smelling incredible around minute 10.
- Make the garlic butter while they bake:
- In a small saucepan over low heat, melt your butter. Add your minced garlic and let it cook gently for just about a minute—you want it fragrant and soft, not brown. Stir in your fresh parsley and a pinch of salt. The whole thing takes maybe 2 minutes, and your kitchen will smell like pure comfort.
- The finishing touch:
- The moment your knots come out of the oven is crucial. While they're still warm, brush them generously with that garlic butter using a pastry brush. Don't be shy—let the butter soak in. Then sprinkle with Parmesan if you're using it. The heat of the knots will slightly toast the cheese, and it all comes together into something that tastes homemade and special.
- Serve immediately:
- These are best eaten while still warm, ideally within the first 10 minutes. That soft dough, the butter still glistening, the garlic fragrant and present—it's a moment worth being present for.
 Pin it
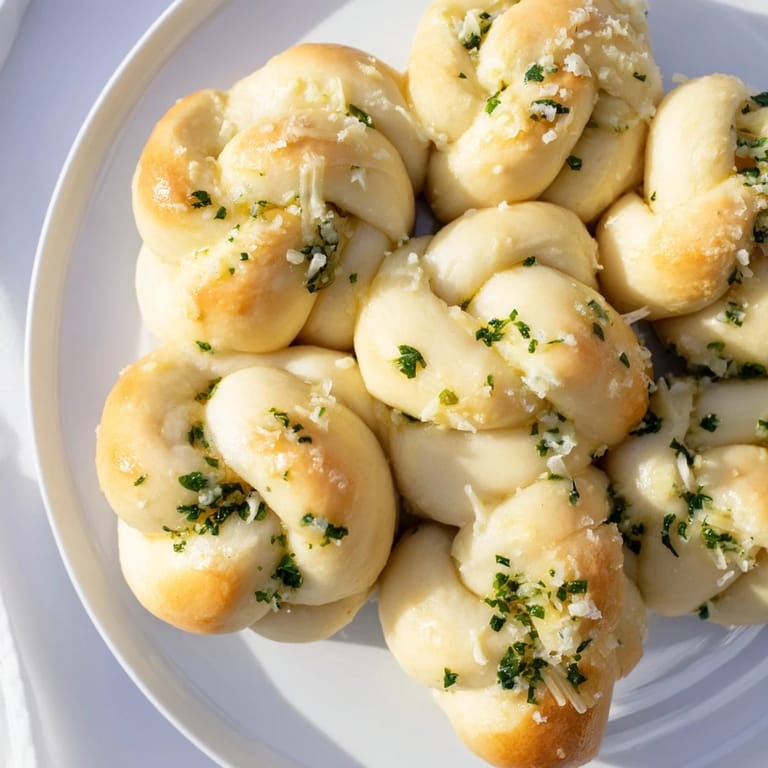
 I'll never forget the time my nephew, who's usually too busy scrolling on his phone to notice food, took one bite of a garlic knot and just went silent. Then he asked if he could have another one, and another one. His mom looked at me like I'd performed a miracle. That's when I realized these knots aren't really about the garlic or even the butter—they're about making people feel seen and cared for. That's what homemade food does.
What Makes These Different
The beauty of homemade garlic knots is that they're so much softer and more tender than the ones from a bakery. That's because you're eating them warm, straight from your own oven, when they're at their peak. The dough in this recipe is deliberately forgiving—it doesn't require any fancy techniques or special equipment. It's dough that wants to succeed. I've found that people often think homemade bread is intimidating, but this recipe proves it doesn't have to be complicated. It just has to be made with attention and a little care.
How to Serve and Share
Garlic knots are the kind of food that brings people together in the best way. Serve them warm as an appetizer before dinner, or pack them in a cloth-lined basket as a snack to bring to a friend's house. They're perfect for casual gatherings where you want the food to disappear quickly and have people asking for seconds. I've also tucked them into lunchboxes, paired them with soups, and served them alongside salads. They work anywhere you need something warm, comforting, and a little bit special.
Storage and Keeping
These knots are best eaten the day they're made, ideally within the first few hours while the dough is still soft and the flavors are brightest. If you find yourself with leftovers (which is rare), wrap them loosely in foil and store them at room temperature for up to two days. To revive them, warm them wrapped in foil in a 300°F oven for about 5 minutes—it won't be quite the same as fresh, but it's still delicious. You can also freeze unbaked knots after shaping them. Pop them straight from the freezer into the oven, add a few minutes to the baking time, and they'll bake up nearly as good as fresh ones. It's like having a warm hug waiting in your freezer for whenever you need one.
- Wrap cooled knots loosely in foil to keep them soft without trapping steam
- Freeze unbaked knots on a baking sheet before transferring to a freezer bag for easy baking later
- Always brush with garlic butter right after baking, even if you're reheating
 Pin it
 These garlic knots remind me that some of the best things in life are simple. They're a tiny bit of effort and a whole lot of joy, baked into a soft, golden knot. Make them, share them, and watch what happens.
Recipe FAQs
- → What type of flour is best for these knots?
All-purpose flour works well, providing the right balance of texture for a soft and fluffy result.
- → Can I prepare the dough ahead of time?
Yes, the dough can be made in advance and reheated briefly before serving to maintain freshness.
- → How is the garlic butter sauce made?
Butter is melted gently with minced garlic, then mixed with fresh parsley and a pinch of salt for an aromatic finish.
- → Are there any recommended serving ideas?
They pair wonderfully with marinara sauce for dipping or served warm on their own as a savory snack.
- → Can I add herbs to enhance flavor?
Adding dried Italian herbs to the garlic butter can provide extra depth and aroma to the knots.