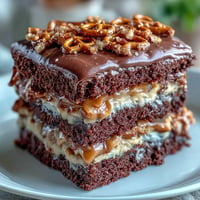
 Pin it
 I remember the first time I made chocolate fudge from scratch—I was visiting my grandmother's kitchen on a rainy afternoon, and she pulled out a worn recipe card with notes scribbled in the margins. That day, I learned that the best fudge isn't complicated; it's about the quality of chocolate and patience while it sets. Now, whenever I make this creamy, melt-in-your-mouth fudge, I'm transported back to that cozy kitchen moment, and I'm reminded that some of life's greatest pleasures come in small, decadent squares.
I'll never forget the Christmas when I made five batches of this fudge for my neighbors. Their faces lit up when they unwrapped the little boxes tied with ribbon, and my shy neighbor across the street actually came over to hug me—all because of chocolate squares. That's when I realized this recipe does more than satisfy a sweet tooth; it creates moments of genuine connection and warmth.
Ingredients
- Sweetened condensed milk (400 g / 14 oz): This is the secret to that silky, fudgy texture. It adds sweetness and creaminess without requiring any sugar crystallization worries. I've learned that using quality condensed milk makes all the difference—cheap brands can leave a slight tinny aftertaste.
- Semi-sweet chocolate chips (340 g / 12 oz): These are your flavor foundation. I prefer chips that aren't too waxy; read labels for real cocoa content. The higher quality your chocolate, the more luxurious your fudge will taste.
- Unsalted butter (60 g / 4 tbsp): Butter adds richness and helps with that melt-in-your-mouth quality. Cut it into pieces before adding so it melts evenly and smoothly into the chocolate.
- Pure vanilla extract (1 tsp): Just a touch of vanilla rounds out the chocolate flavor and adds subtle depth. Don't skip it—it's what takes this from good to unforgettable.
- Chopped walnuts or pecans (60 g / ½ cup, optional): Nuts add a pleasant crunch and earthy note that plays beautifully against the sweet chocolate. Toast them lightly before chopping if you want even more flavor.
- Sea salt (pinch, optional): A whisper of salt on top brightens the chocolate and makes people say, 'What is that?' in the best way possible.
Tired of Takeout? 🥡
Get 10 meals you can make faster than delivery arrives. Seriously.
One email. No spam. Unsubscribe anytime.
Instructions
- Prepare your canvas:
- Line your 20 cm (8-inch) square baking pan with parchment paper, letting the edges hang over the sides. This is your insurance policy—it makes lifting the fudge out later so much easier. I've learned this the hard way after wrestling with a pan of fudge once.
- Combine and melt gently:
- Pour the sweetened condensed milk into a medium saucepan and set it over low heat. Add the chocolate chips and butter pieces. This is where patience becomes your best friend. Stir constantly and slowly, watching as the chocolate begins to soften and blend into a glossy, smooth mixture. The low heat prevents the chocolate from seizing or becoming grainy. You'll know it's ready when you can no longer see any chunks of chocolate or butter—usually about 5 to 8 minutes.
- Add the finishing touch:
- Remove the saucepan from the heat and stir in the vanilla extract. If you're using nuts, fold them in gently with a spatula, distributing them evenly throughout the mixture. The warmth of the fudge will slightly soften the nuts, which is exactly what you want.
- Transfer and smooth:
- Pour the warm fudge into your prepared pan and use a spatula to smooth the top into an even layer. Work quickly but gently—you're aiming for a professional-looking finish. Take a moment to appreciate how luxurious it looks.
- Add the optional flourish:
- If using sea salt, sprinkle a light pinch evenly over the top right now, while the fudge is still warm. The heat will make the salt adhere beautifully.
- Patience pays off:
- Slide the pan into your refrigerator and set a timer for at least 2 hours. I know it's hard to wait, but this is when the magic happens. The fudge will set from the edges inward, becoming firm and creamy. Resist the urge to check it constantly.
- Cut and serve:
- Once fully set, use the parchment overhang to carefully lift the fudge from the pan onto a cutting board. Using a sharp knife (warm it under hot water and wipe dry between cuts for cleaner cuts), slice the fudge into 24 neat squares. Serve at room temperature or chilled—both are delicious.
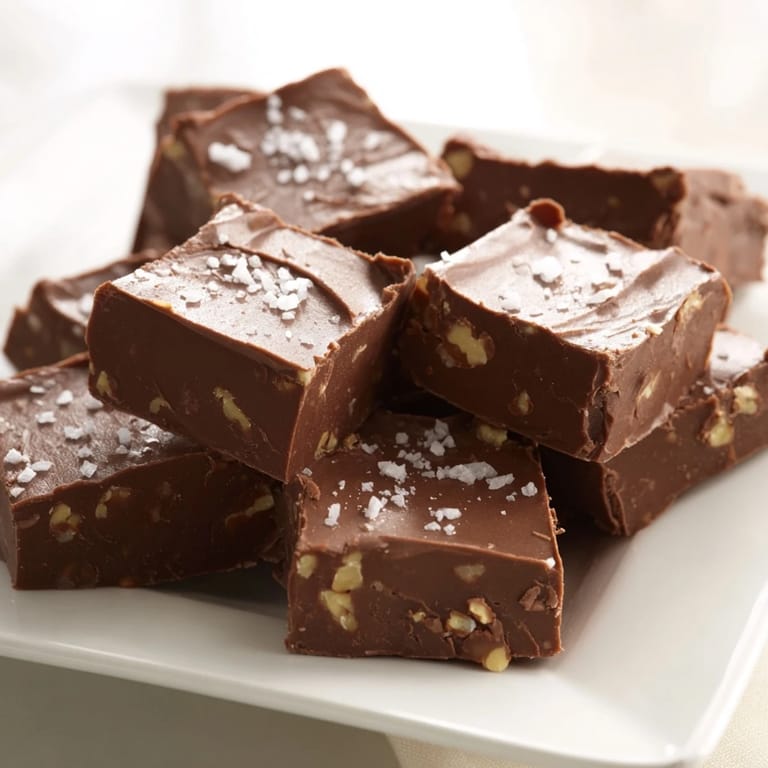
 Pin it
 There's something almost meditative about making fudge—the way the chocolate transforms into glossy smoothness, the warmth of the pan in your hands, the anticipation of that first taste. Years ago, I made this with my daughter when she was learning to cook, and she was amazed that something so elegant could come from such simple steps. Now, whenever I make it, I think of that moment and smile.
Storage and Shelf Life
Store your fudge in an airtight container in the refrigerator, where it will keep beautifully for up to 2 weeks. The cold helps maintain that perfect fudgy texture. If you're giving it as a gift, layer it between parchment paper in a pretty box—it looks more special that way. I've found that fudge actually tastes even better after a day or two, as the flavors meld and deepen.
Flavor Variations to Explore
Once you've mastered the basic recipe, the possibilities expand beautifully. You can swap the semi-sweet chocolate for dark chocolate if you prefer deeper, more sophisticated flavors, or use milk chocolate for something sweeter and gentler. I've experimented with adding a teaspoon of espresso powder to intensify the chocolate, or a pinch of cayenne pepper for unexpected heat. Some of my favorite creations have come from these small experiments—they're how you make a recipe truly your own.
Gift-Giving and Special Occasions
Homemade fudge is one of my favorite gifts to give because it feels personal and thoughtful without being labor-intensive. I love arranging these squares in small boxes lined with parchment, tied with a ribbon, and adding a handwritten note about what makes each batch special. People genuinely treasure homemade gifts far more than store-bought sweets, and this recipe proves that something simple can still feel luxurious and intentional.
- Pack fudge in single layers separated by parchment paper to prevent sticking and melting together.
- Keep gifts in a cool place until giving, and include a note about storing it in the refrigerator.
- Consider making a double batch during holiday season—you'll be so glad you did.
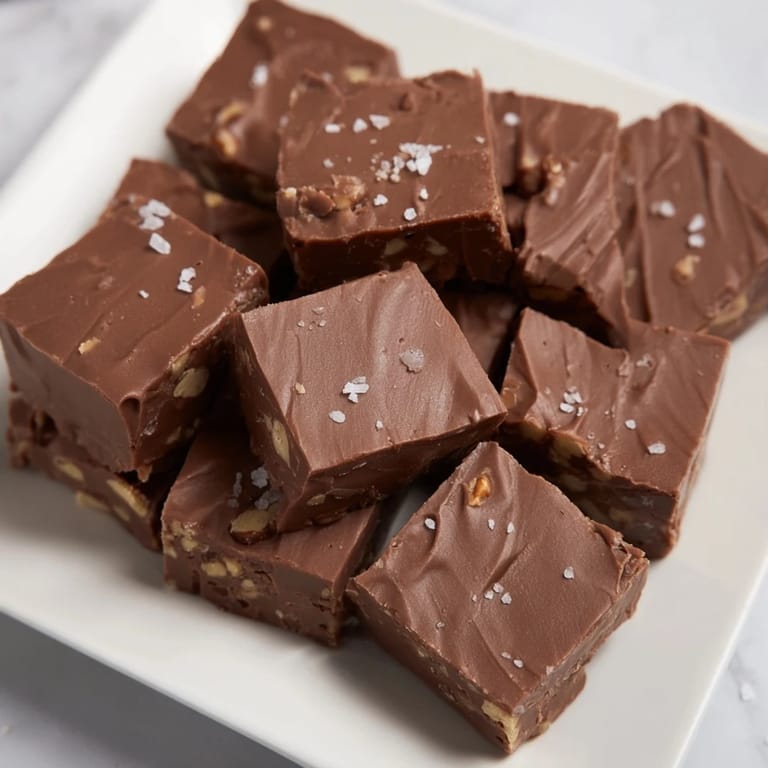
 Pin it
 Making fudge is a small gift you give yourself and everyone you share it with. There's real joy in transforming five simple ingredients into something that tastes like it came from a fancy chocolaterie. I hope this recipe becomes part of your kitchen stories too.
Recipe FAQs
- → What type of chocolate works best?
Semi-sweet chocolate chips provide a balanced sweetness, but dark or milk chocolate can be used for varied flavor profiles.
- → Can I omit nuts in the fudge?
Yes, simply leave out the walnuts or pecans for a smooth, nut-free texture.
- → How long should the fudge chill?
At least two hours in the refrigerator to ensure it sets firm enough for cutting.
- → Is there a way to enhance the flavor?
A teaspoon of pure vanilla extract adds a gentle aromatic touch that complements the chocolate.
- → How should leftovers be stored?
Keep the fudge in an airtight container refrigerated for up to two weeks to maintain freshness.
- → Can I add sea salt to the fudge?
Yes, a pinch of sea salt sprinkled on top enhances the chocolate’s sweetness and adds complexity.